This semester, I'm working on three distinct projects. The first is a 'Group Client Project,' where each of us selected a brief that aligned with our skills. We then collaborated with the client to create outcomes tailored to their needs. The second project involves an 'RSA Case Study,' where we chose a brief and conducted research using both primary and secondary sources. Interestingly, the RSA brief is also the foundation for the last module, the 'Individual RSA Project.' In this module, I'll be creating a 3D model to complement and support the findings discussed in my case study. This interconnected approach allows me to delve into different aspects of my coursework, combining theoretical knowledge with practical application in the form of a 3D model.
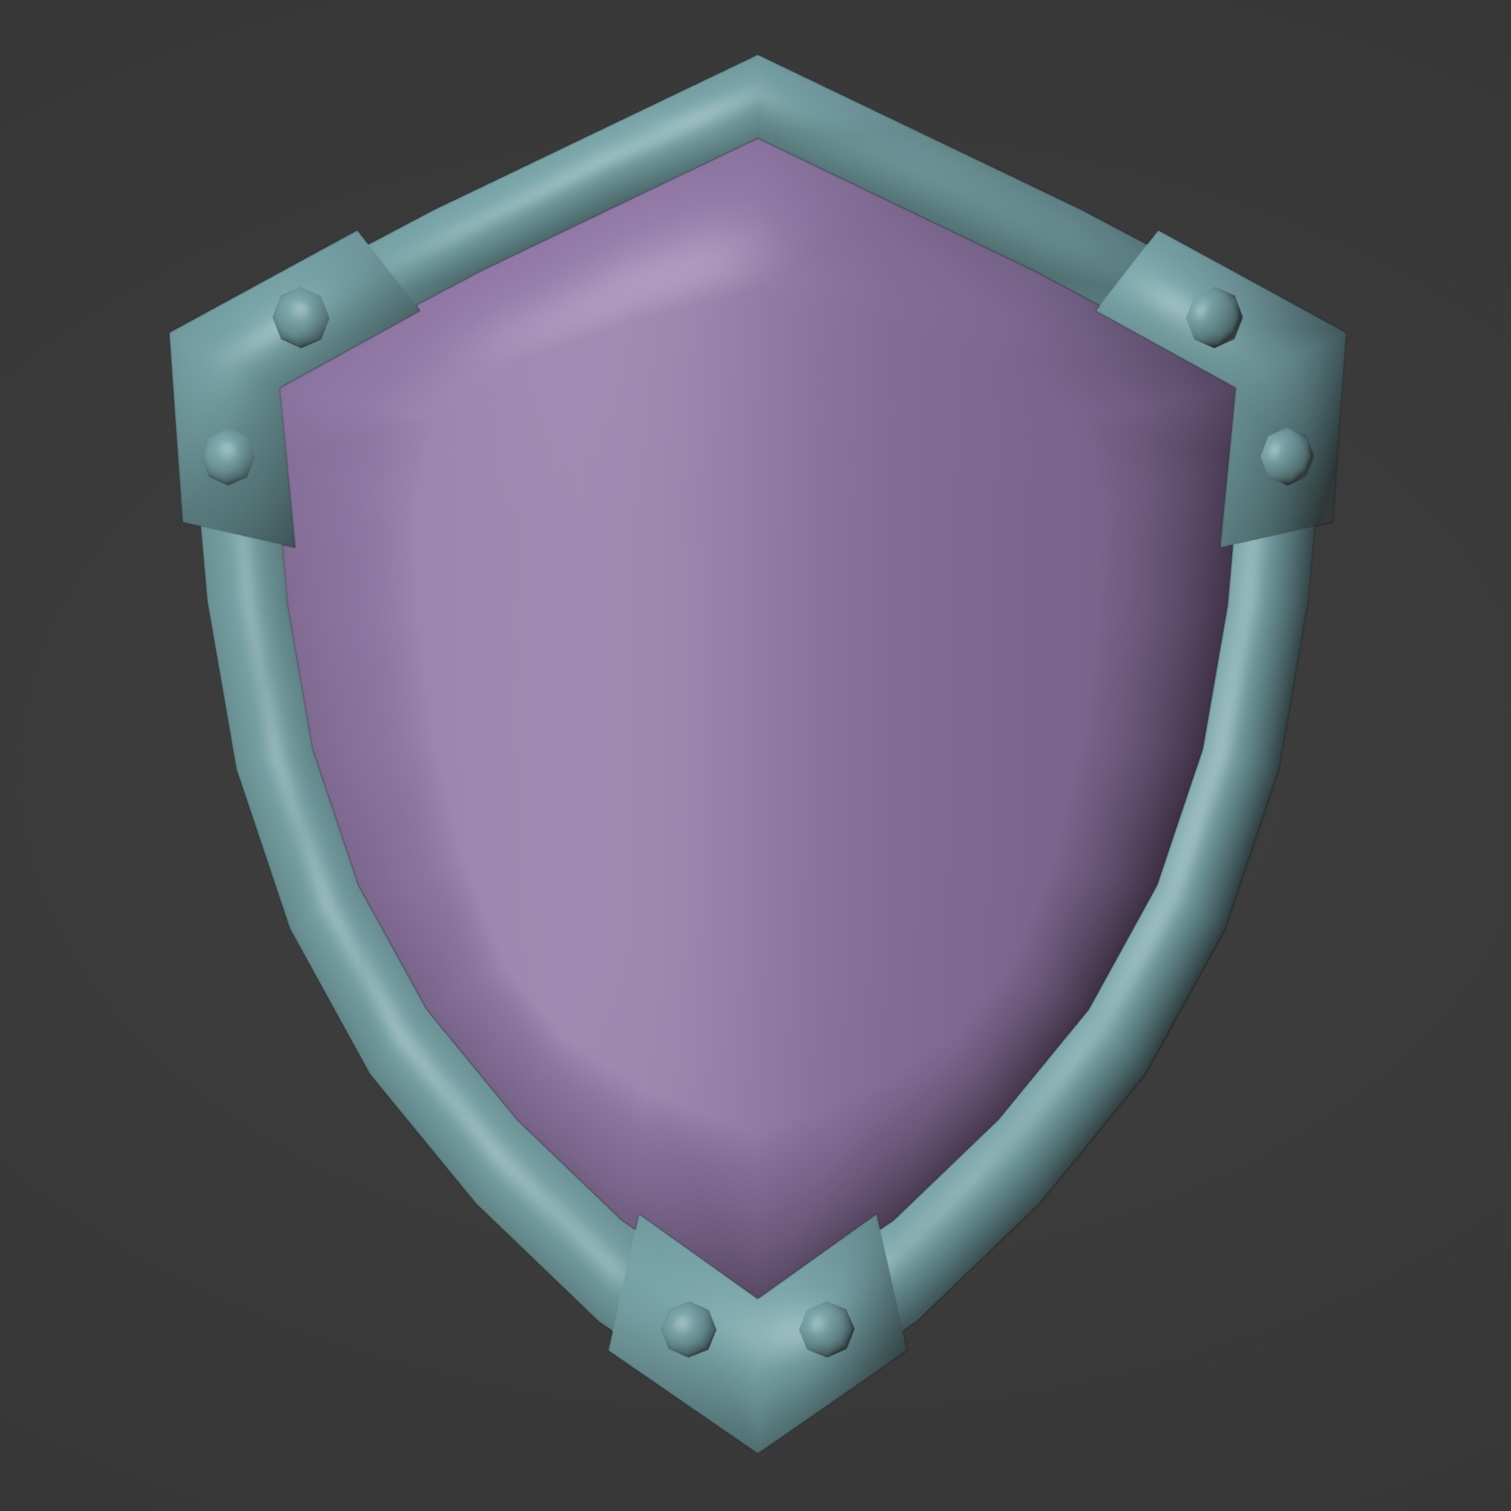
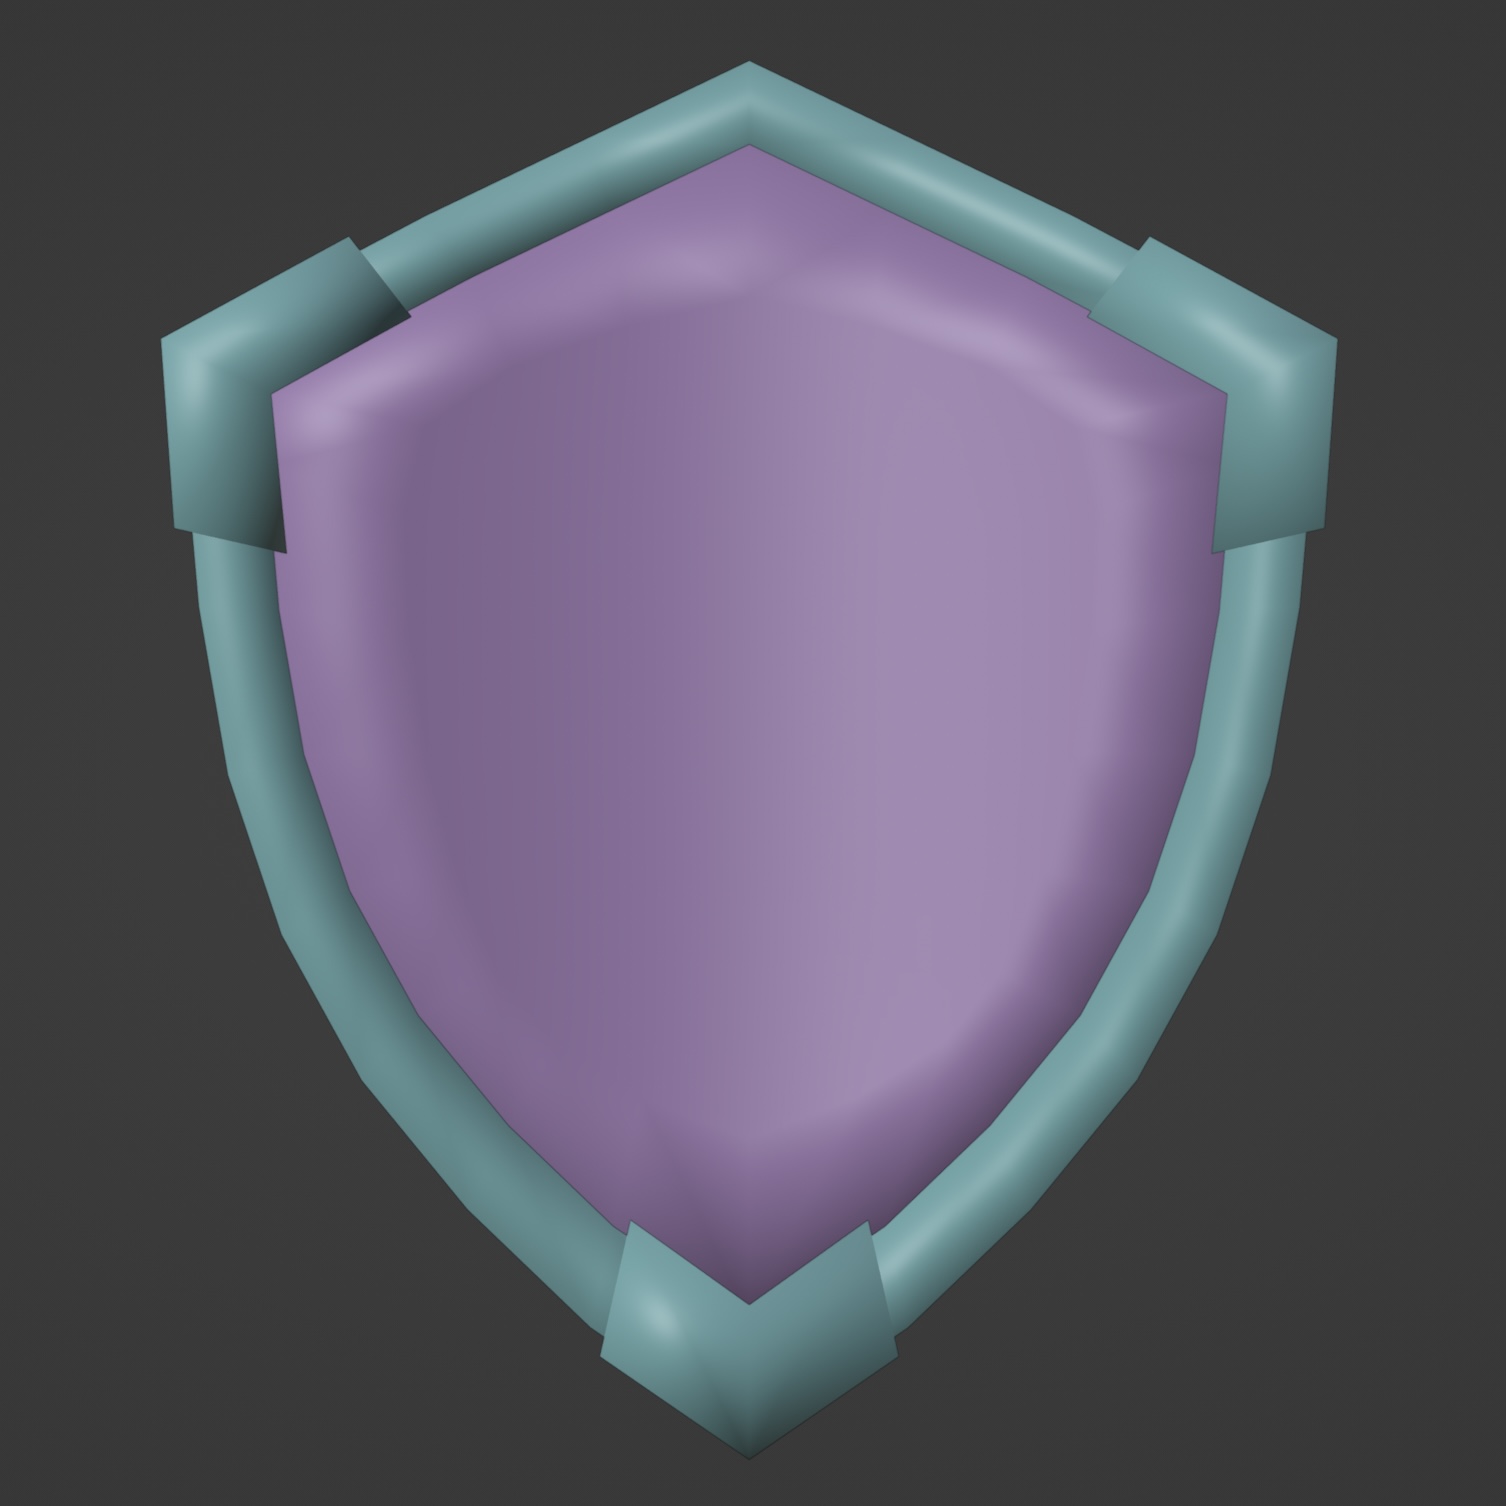
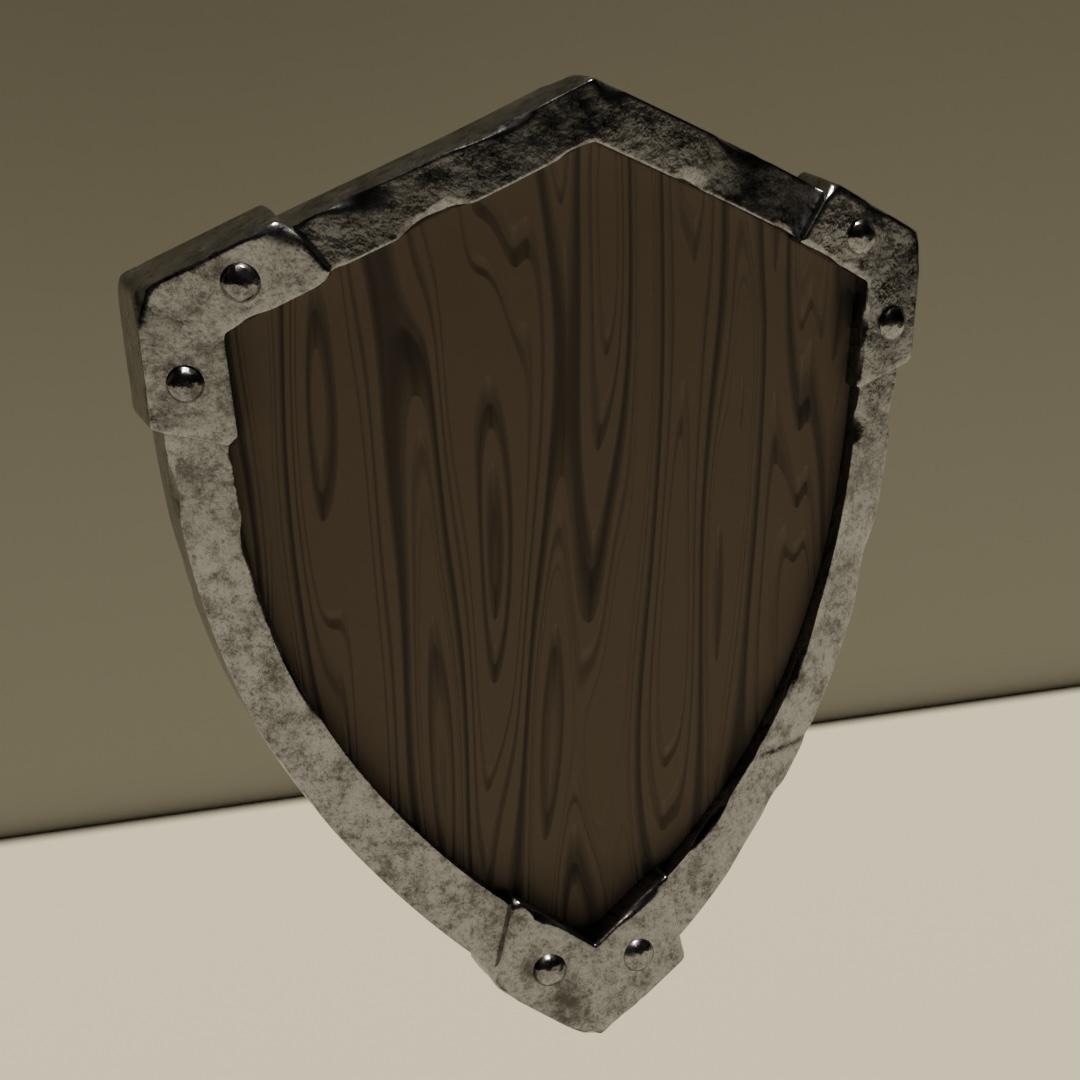
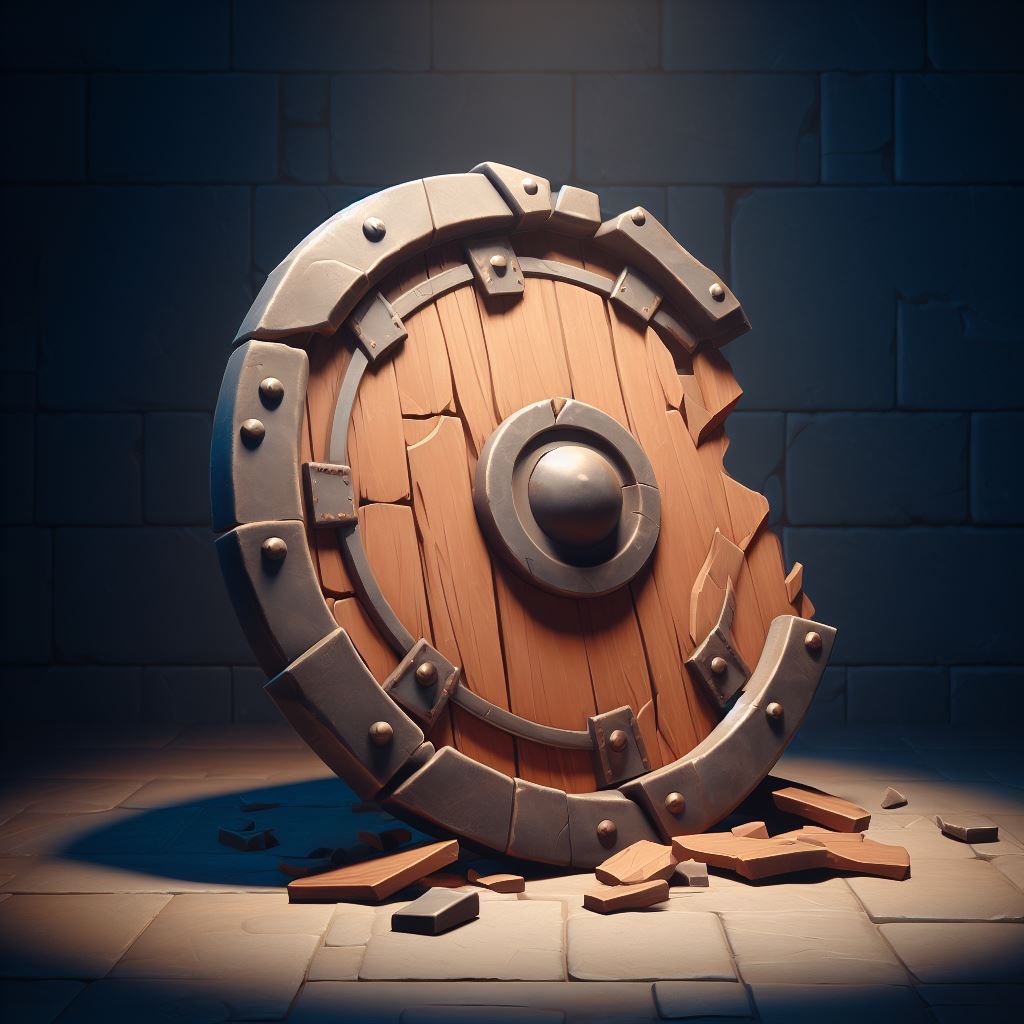
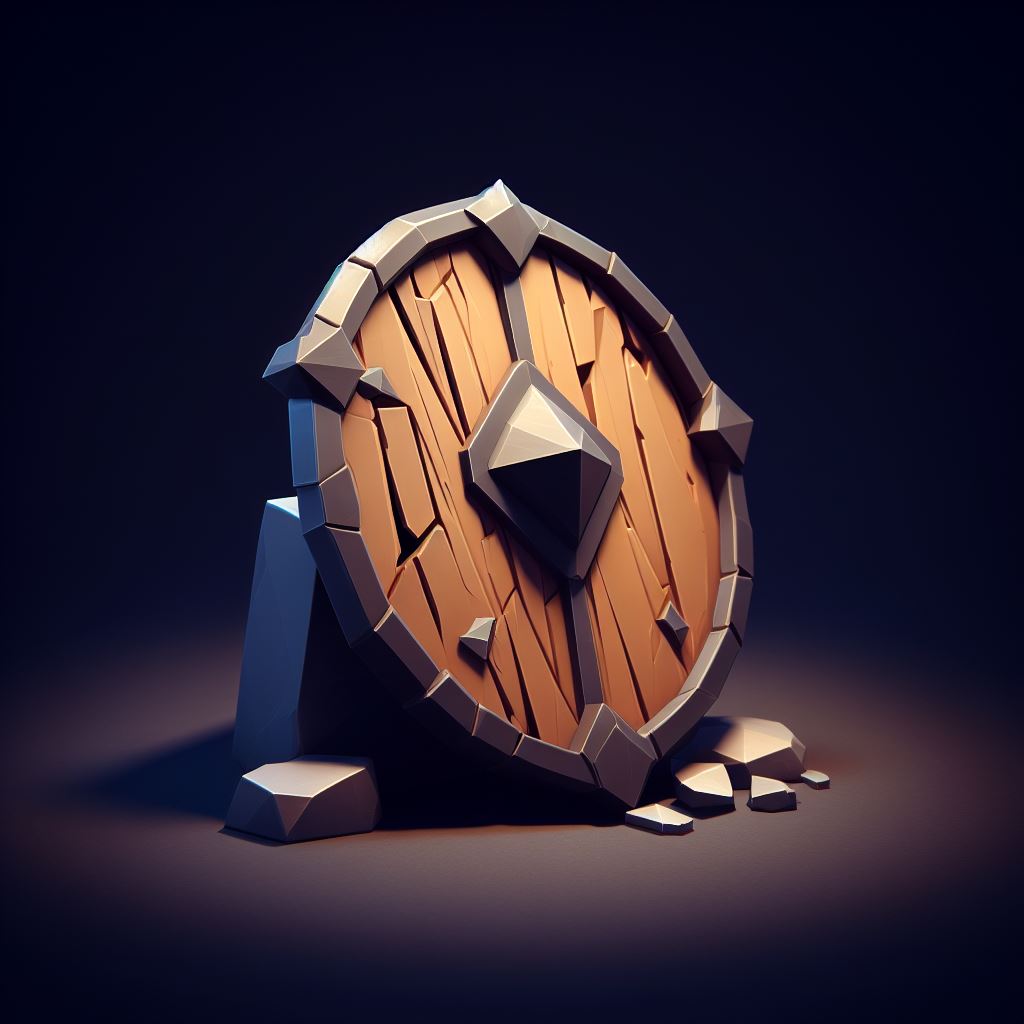
Setting out to create a shield asset for our Low Poly 3D, Stylized, Fantasy, Top Down Dungeon game required a methodical approach to produce both low-poly and high-poly versions, both of which enhanced the final product's visual attractiveness. The low-poly model was first created by creating a simple shield blockout from a flat plane. This involved constructing the shield's primary wooden body, adding rivets for structural integrity, and attaching a metal accent around the shield. The mirror modifier made the shield's back easier to create and gave it additional thickness for a heavier feel. Once the basic form was determined, the proportionate editing function was utilised to guarantee a realistic and seamless curve, removing any irregularities. Smooth shading was applied to the low-poly shield when it was finished, and great care was taken to maintain the triangle count below the specified 2k threshold.
Transitioning to the high-poly phase involved duplicating the refined low-poly model. This second version aimed to showcase intricate details that would enhance the shield's realism in the game. To achieve a high-poly appearance, specific edges were selected to exhibit sharpness, and the edge data was adjusted to approximately 0.9 using Blender's user-friendly interface. Adding a multiresolution modifier and subdividing to level 5 further refined the model, enhancing its complexity.
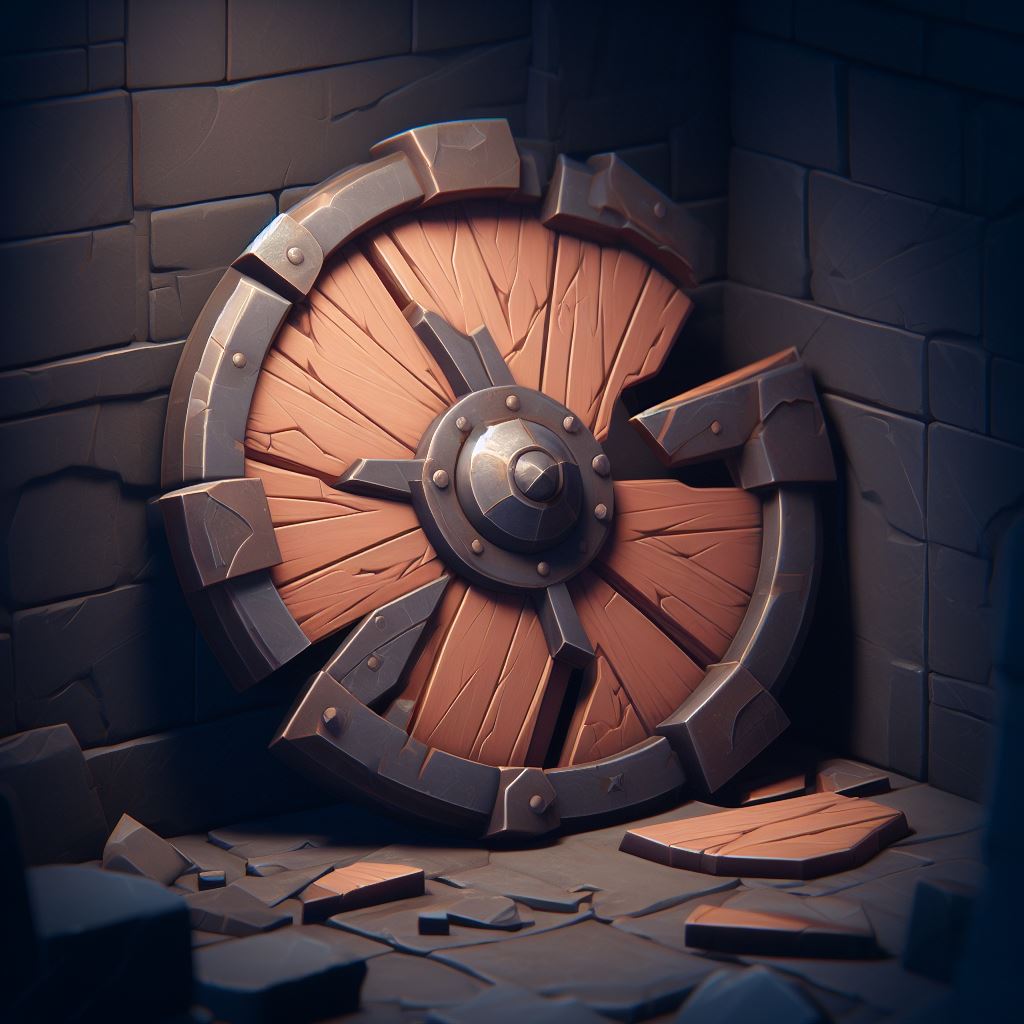
The result of these efforts enabled the shield to go through an alteration in Blender's sculpting mode. Here, the focus was on incorporating subtle details into the metal accents to depict a story of conflicts and ageing. Delicate adjustments were done, such rounding off a few sharp edges, adding dents that looked like they were caused by sword strikes, and meticulously creating a hammered effect on the rivets. Together, these subtleties gave the shield a worn-out, weathered aspect that perfectly complemented the fantasy setting of the game. The outcome was a meticulously designed shield asset that merged in well with the game's aesthetics, adding authenticity and history to the player experience overall.
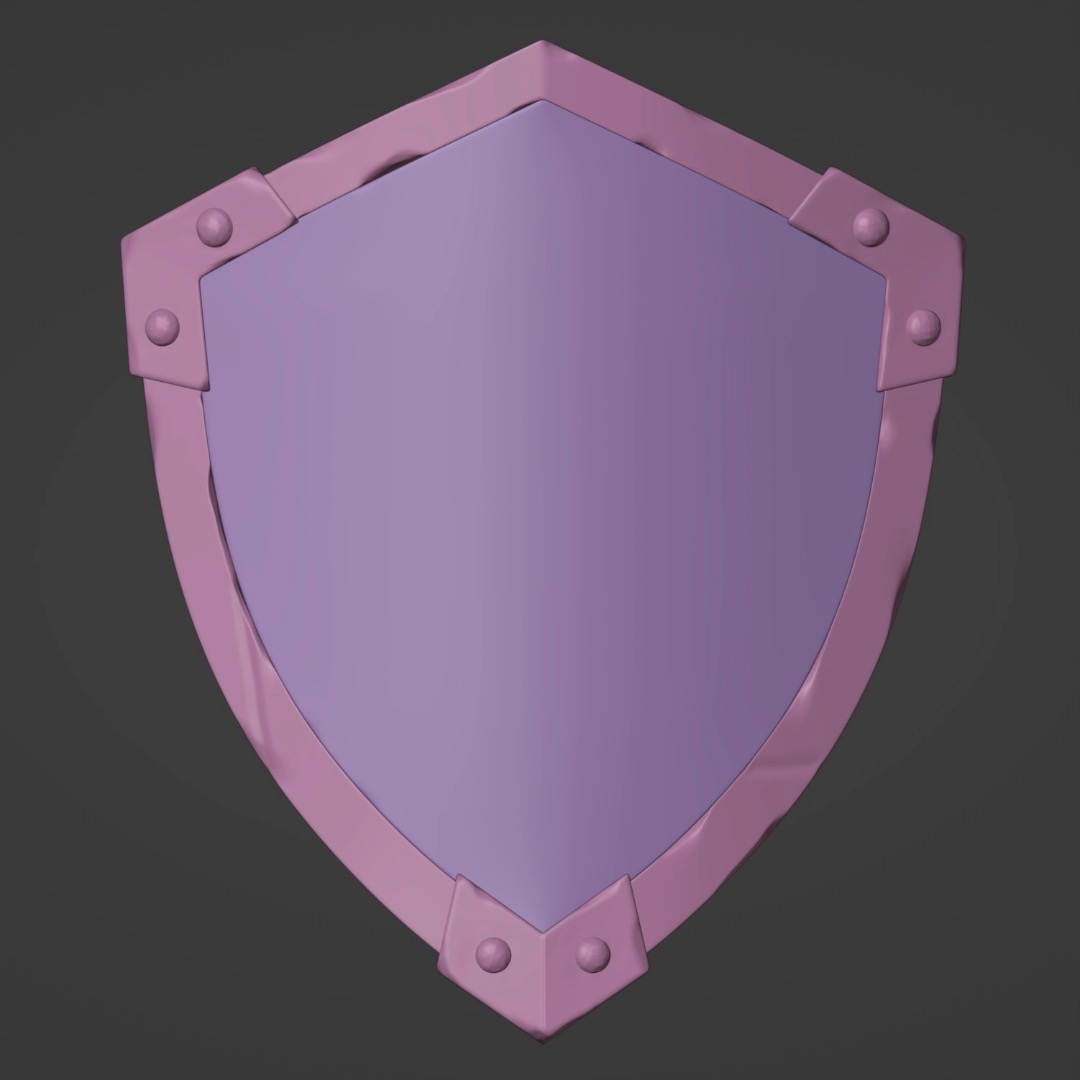
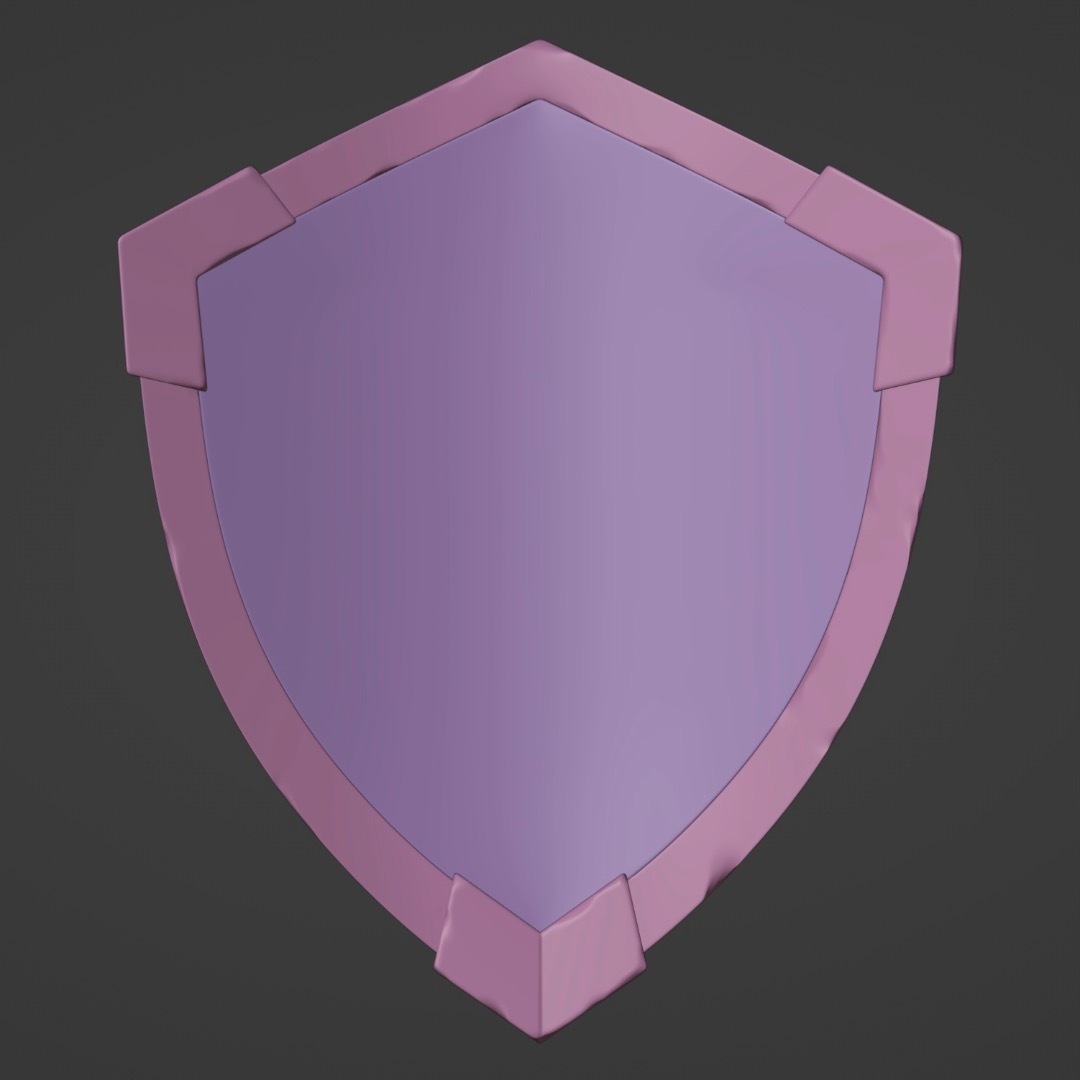
After completing the shield's intricate details, I experimented with several textures to give it a unique appearance. I created these textures using the shader editor in Blender. I combined musgrave texture nodes, noise texture nodes, and colour ramp nodes to procedurally produce the textures for the metal and wood sections instead of using images or photos. These nodes give me more control over the appearance of the textures, such as the metal's shiny spots or the wood's grain. Once I had put the textures on the shield parts, I noticed it didn't look good – it seemed fake and didn't match what the client wanted. So, I decided to ditch the procedural textures I made and switched to Substance Painter instead, to see if I could create a better-looking texture using that software.

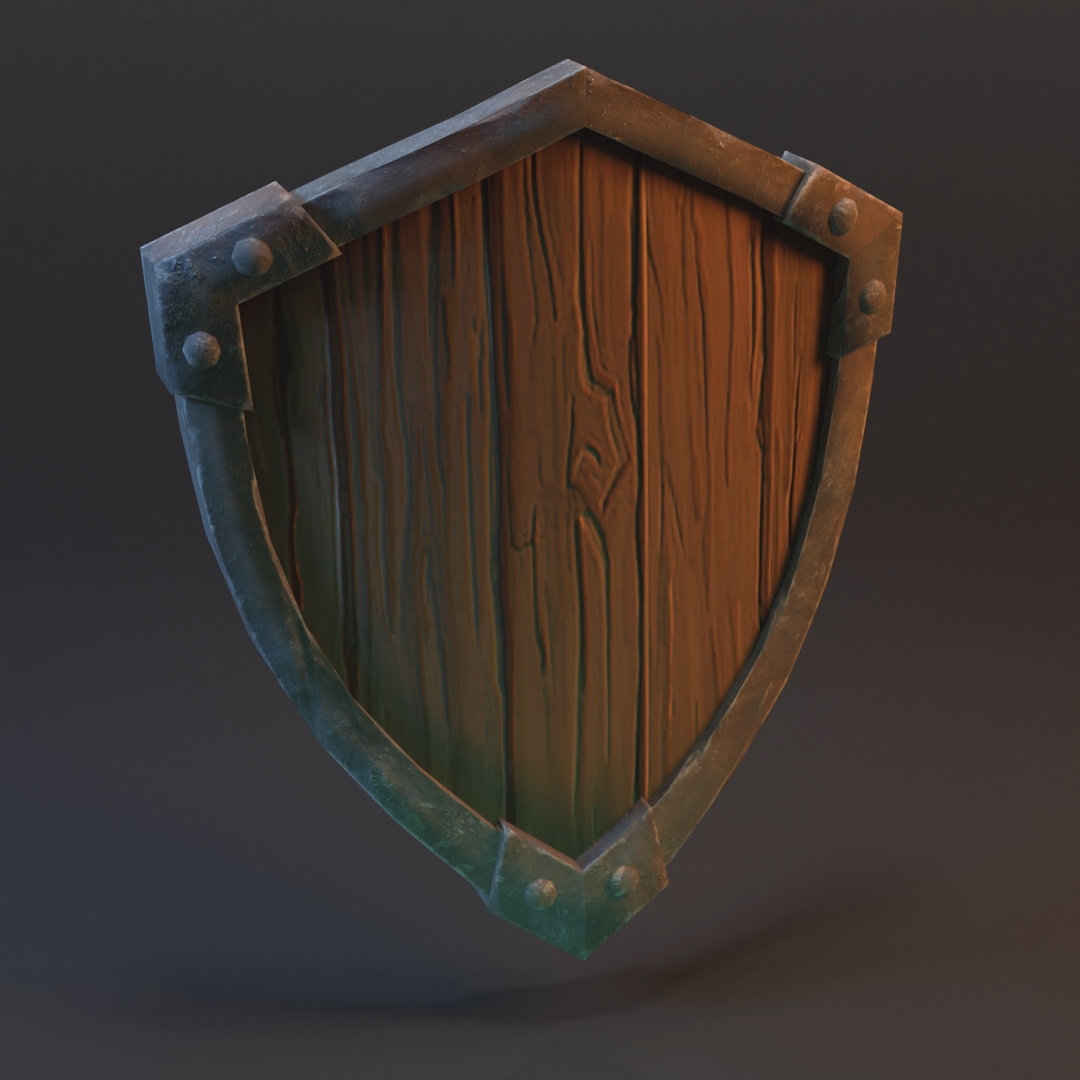
Upon bringing my shield asset into Substance Painter, my initial step involved baking the intricate details from the high-poly version onto the low-poly counterpart. This crucial process ensured that when integrated into the game, the shield wouldn't overwhelm its performance and could run seamlessly.
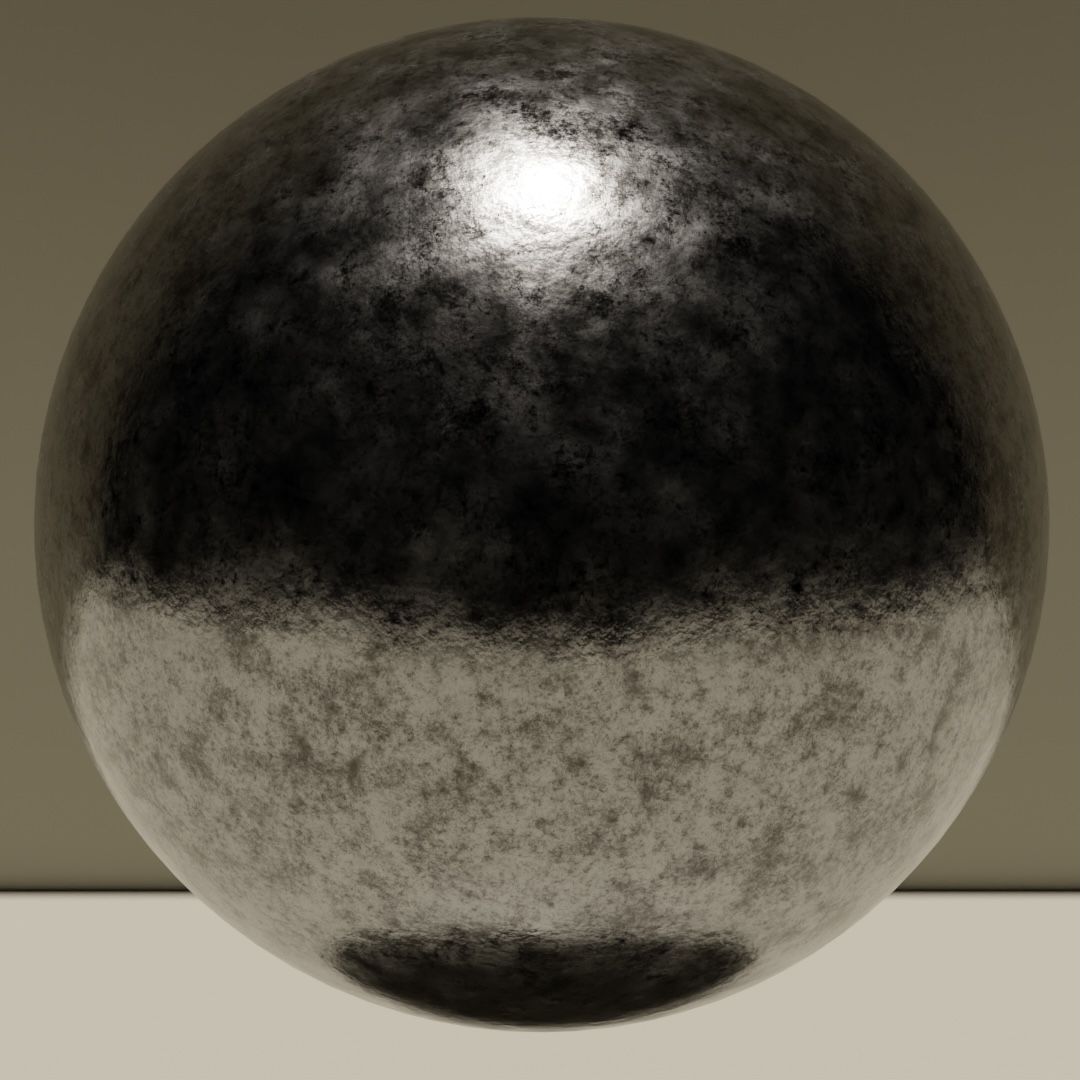
Following this, I delved into Substance Painter's extensive range of materials and textures, exploring both the regular and smart material tabs to discover options that resonated with the desired game style. While browsing, I stumbled upon a couple of promising materials for the metal and wood components. Although I couldn't use these materials as they were, I drew inspiration from them. For the wood texture, I opted to use an AI image generator to acquire tile-able images of stylized wood plank textures. Combining these images, I selected a fitting section to apply to my shield. Utilizing the polygon fill feature, I could paint this new texture directly onto the 3D model, specifically on the wooden sections. As for the metal texture, I incorporated a discovered smart material onto the model. In the properties tab, I fine-tuned various settings, adjusting darkness, roughness, and noise to enhance a weathered effect, aligning it more closely with the client's preferred stylistic nuances.
After completing the texture application process in Substance Painter for my 3D model, the next step involved exporting these textures. This export allowed me to seamlessly incorporate the textured model back into Blender, where I could further refine and eventually generate a rendered image of the final product. Fortunately, the client facilitated this phase by providing a well-prepared Blender file specifically tailored for rendering my shield. This file was meticulously configured, featuring stylized lighting settings that effectively simulated the in-game environment. This simulation proved invaluable, offering a preview of how the shield would appear within the game, enabling me to make any necessary adjustments to ensure the final result met both my creative vision and the client's expectations.
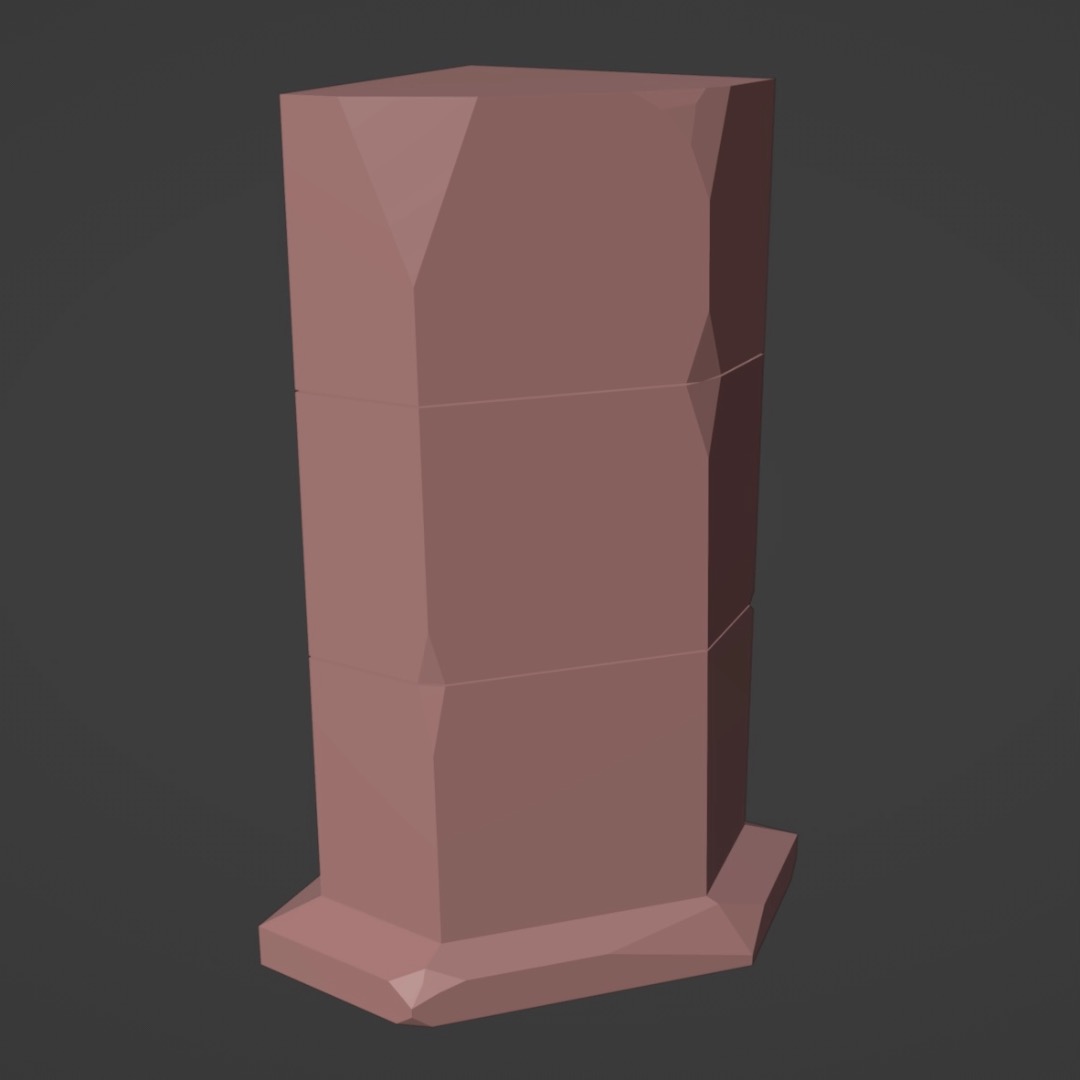
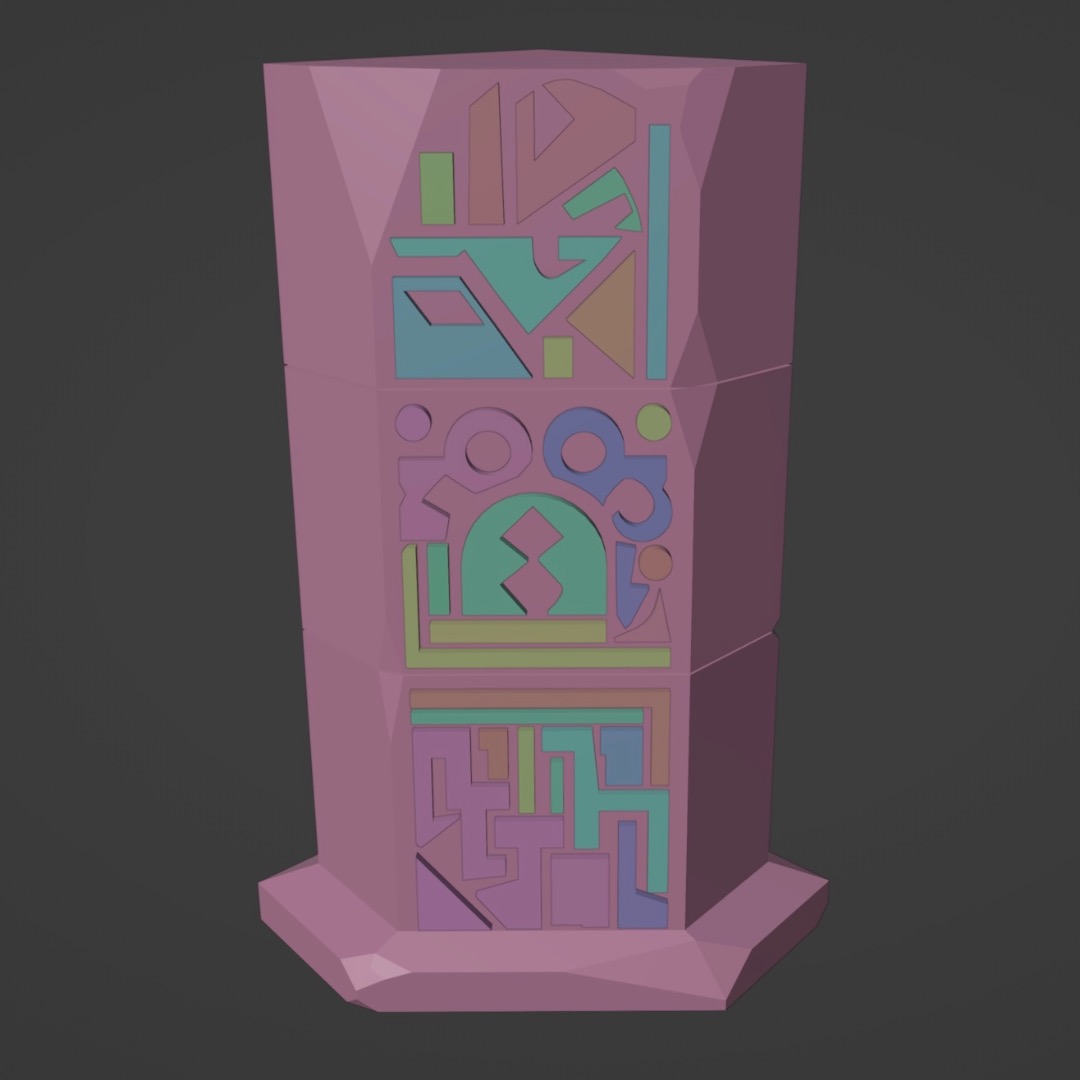
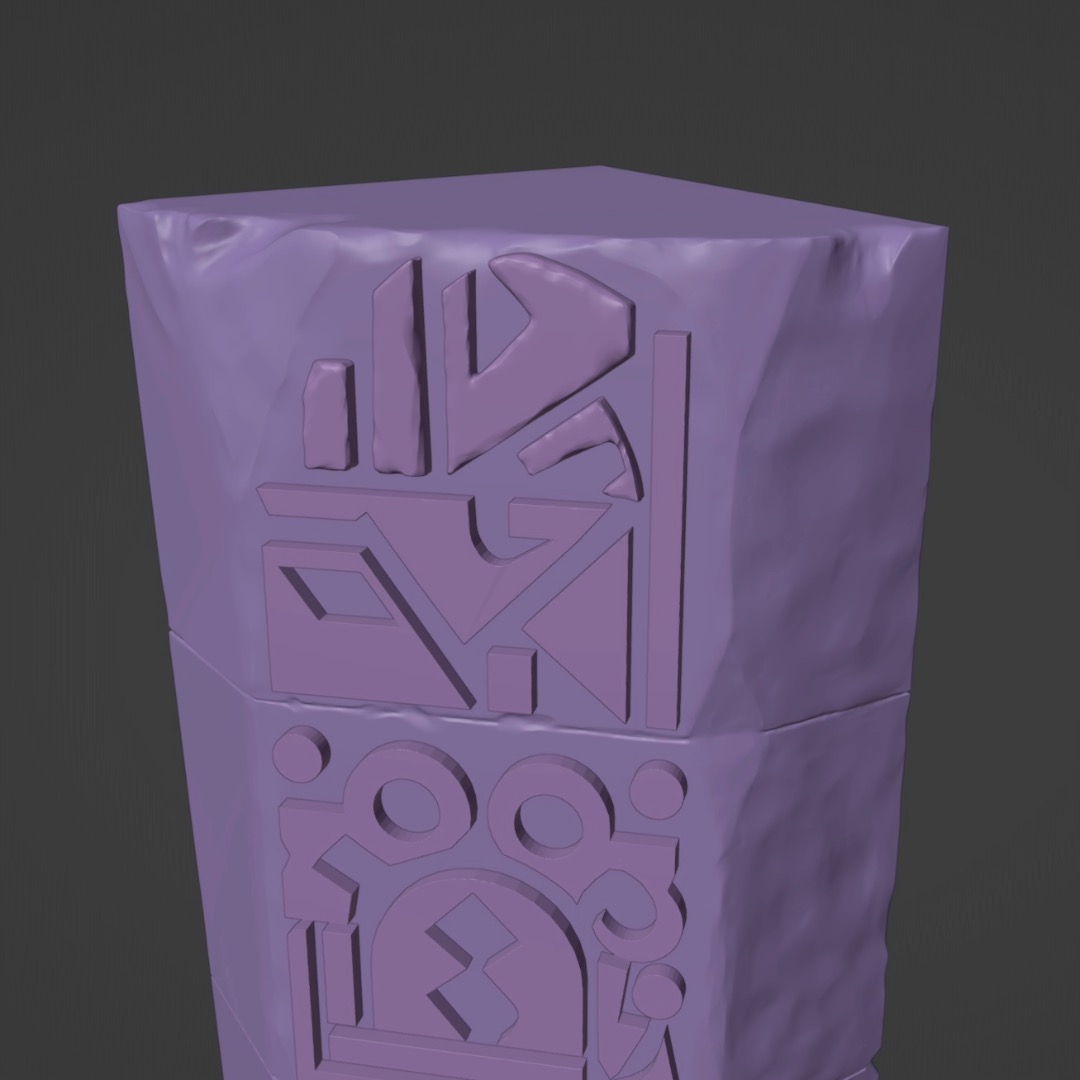
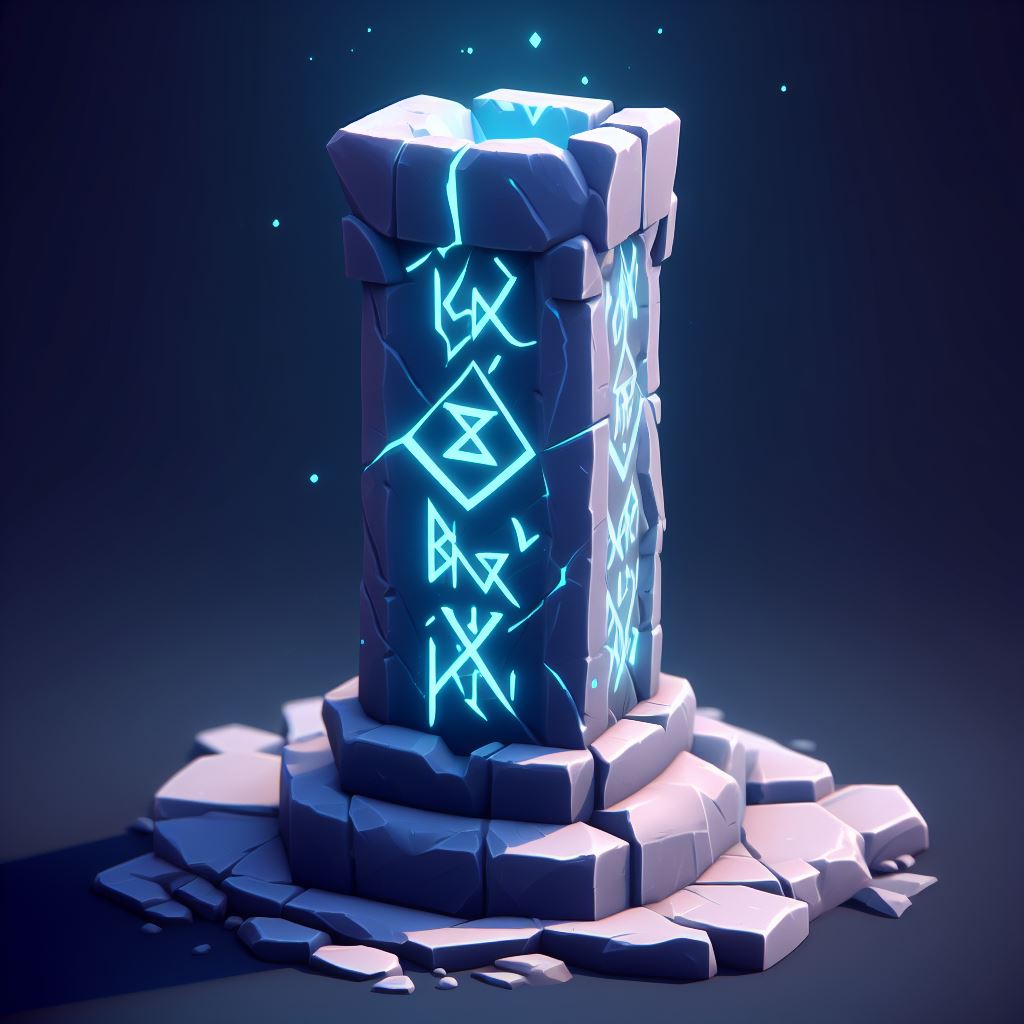
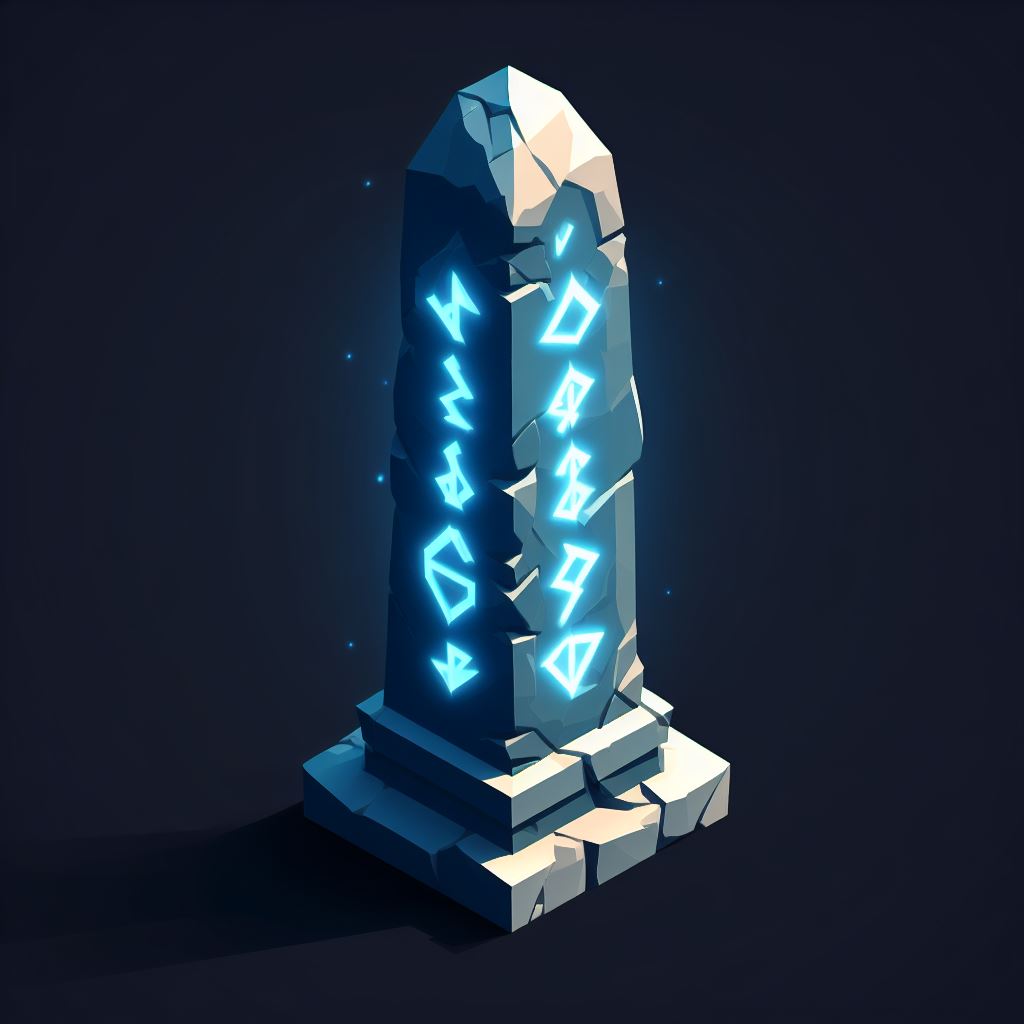
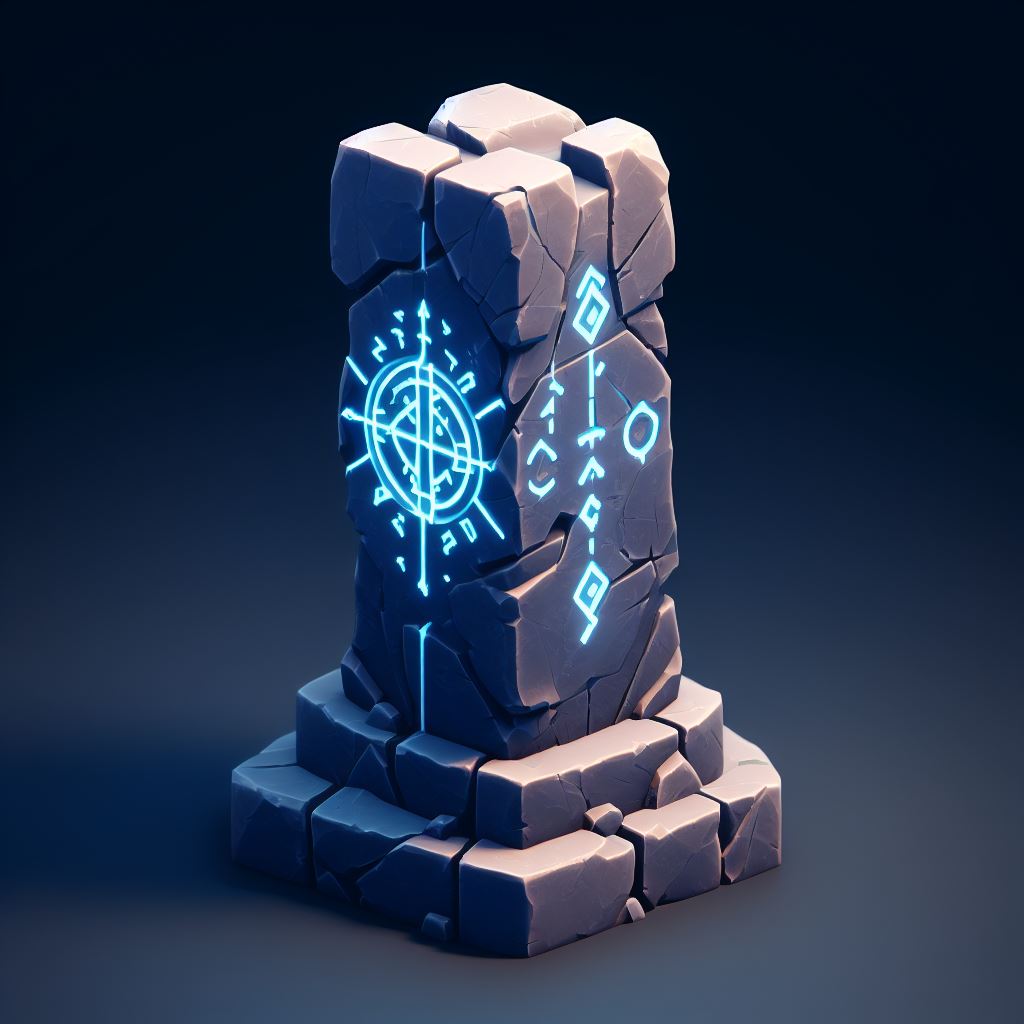
Upon completing the shield asset, my subsequent task involved crafting the corner pillars to become integral components of the game environment. Similar to the shield creation process, I initiated the pillar design by generating concept art. Bing's AI image generator proved handy for exploring diverse visual ideas for the pillars. Once I had a few concepts, incorporating a Mayan rune pattern at the client's request, I delved into modeling some basic blockouts to assess which shapes would best complement the game layout. Seeking client input, we discussed their preferences and envisioned appearance for the pillars. Based on their feedback, I adjusted one of the original models to align with the client's vision, ensuring it matched their expectations. After confirming the model's compatibility with the client's imagination, I proceeded to create the Mayan runes for the pillars. Utilizing Bing's AI image generator again, I obtained a 2D Mayan rune pattern. Importing this pattern into Blender as a plane, I began shaping it to fit onto the face of the pillar, considering the chosen in-game camera angle.

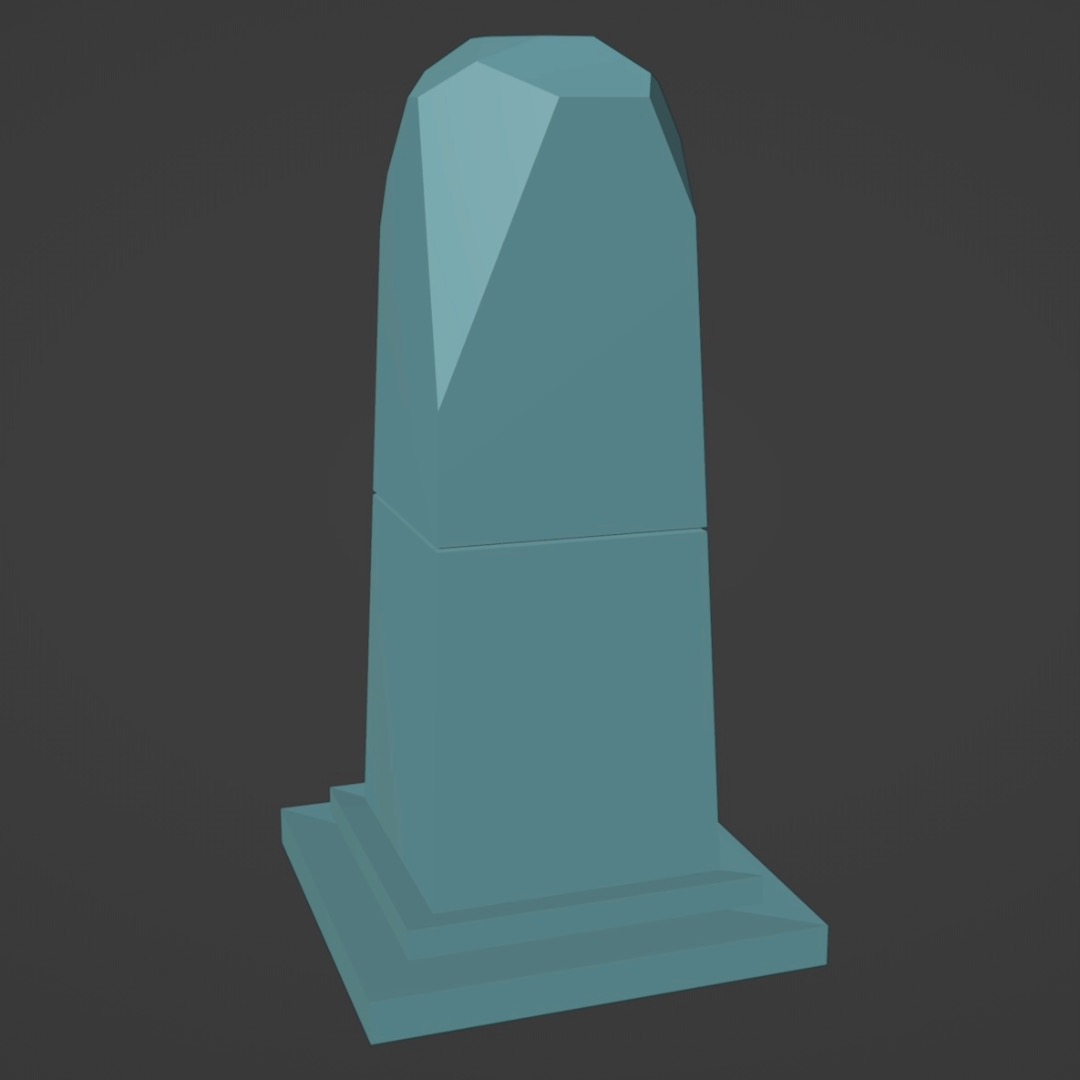
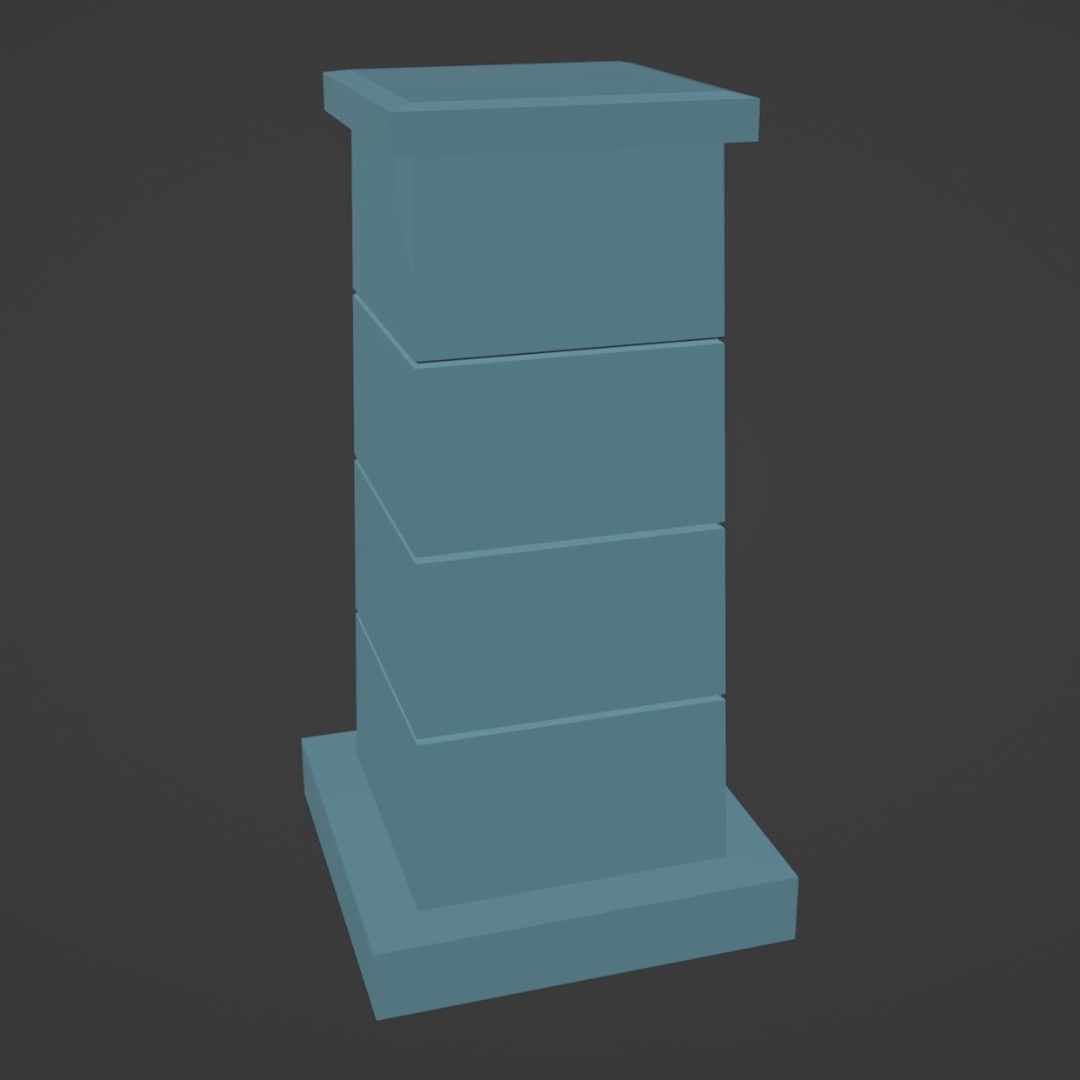
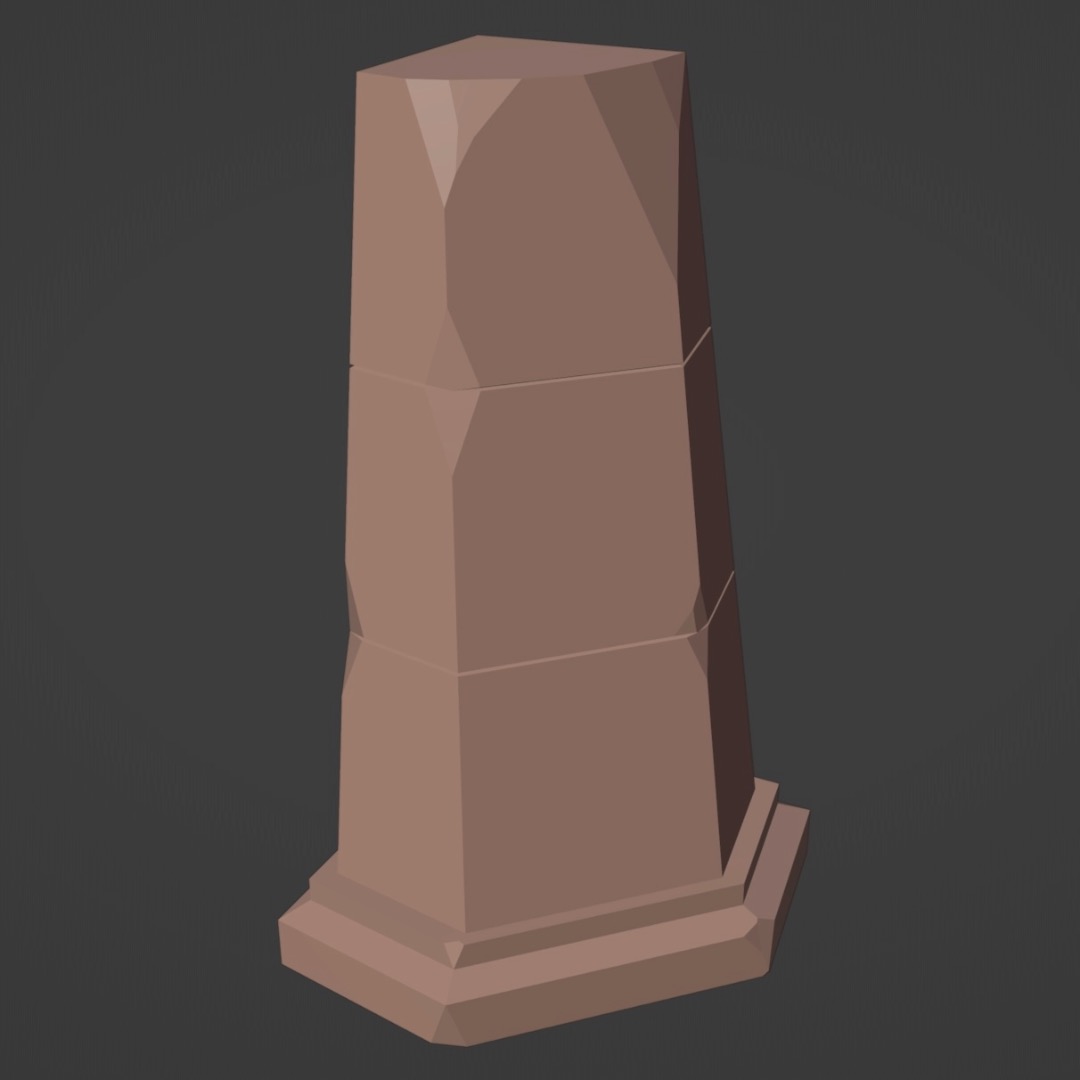
Moving on to the detailing phase, I duplicated both the pillar and the pattern to create both a low-poly and a high-poly version. Similar to the shield process, the high-poly version would accommodate all the finer details. To enhance the pillar's intricacies, I transitioned to sculpting mode in Blender, utilizing the clay strips, scrape, and smooth brushes. These sculpting brushes allowed me to add, sharpen, and smooth details onto the model, simulating the appearance of a pillar carved from a substantial rock.
While I didn't have ample time to complete this project segment, the subsequent steps would mirror those I employed for the shield. This entails finalizing the detailing, baking the details onto the low-poly model in Substance Painter, applying a texture to align with the game's style in Substance Painter, and finally, importing the completed model back into Blender to capture a rendered image of the finalized outcome.
At the start of our group client project, we got the client's approval to use an AI image generator from Bing for creating concept art. This AI tool helped us find inspiration for designing the 3D models in our game. Essentially, we used it to generate visual ideas that would guide the look and feel of the game's elements. The client liked the idea of using AI to kickstart our creativity and approved this approach as a helpful way to gather initial concepts for the 3D models that would eventually become part of our game. This collaboration allowed us to explore various visual directions and ensured that our final designs were informed and aligned with the client's vision.
In light of this, I've gathered some AI-generated images for the assets I'm creating for the project. I use these computer-generated images as a source of inspiration and ideas for my 3D models. My goal was to use these AI images to enhance the detail and appropriateness of my creations for the project.

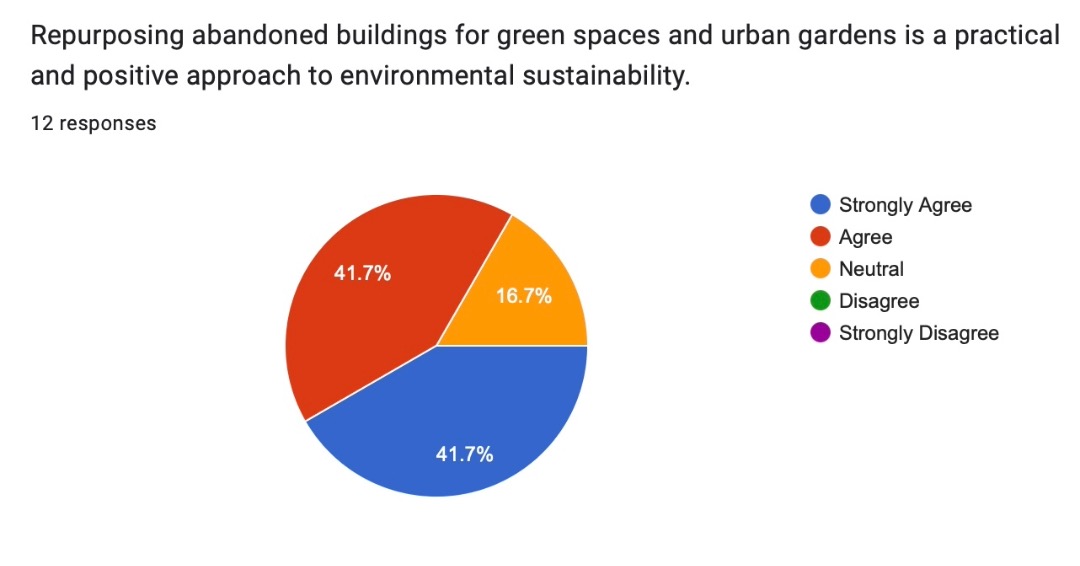
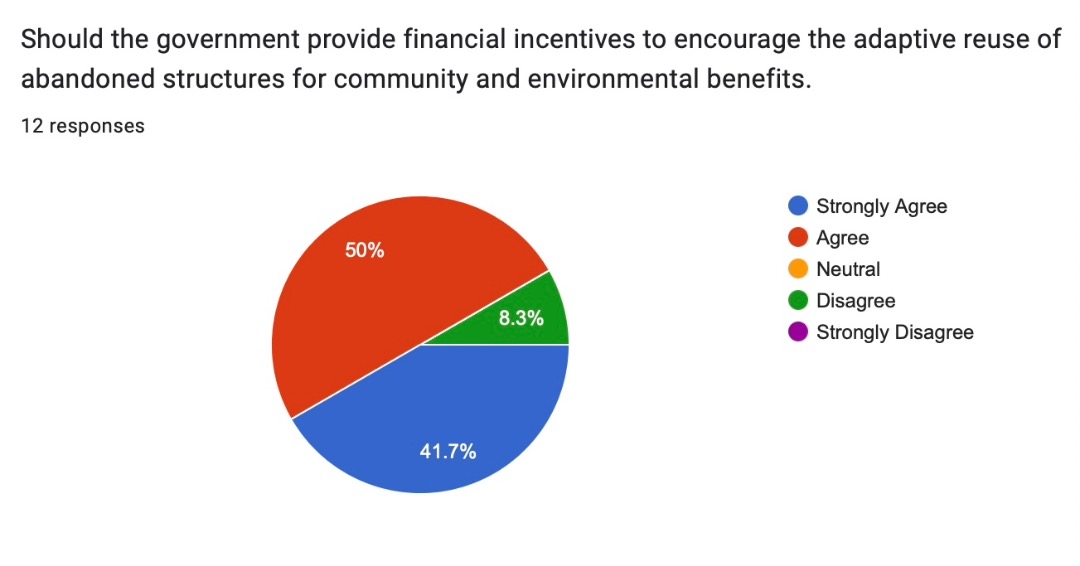
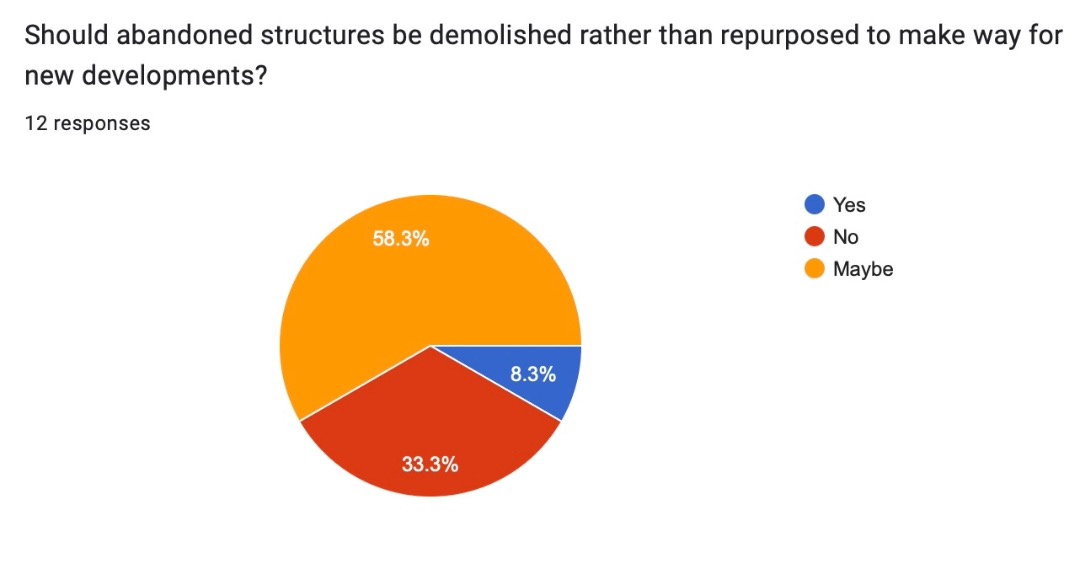
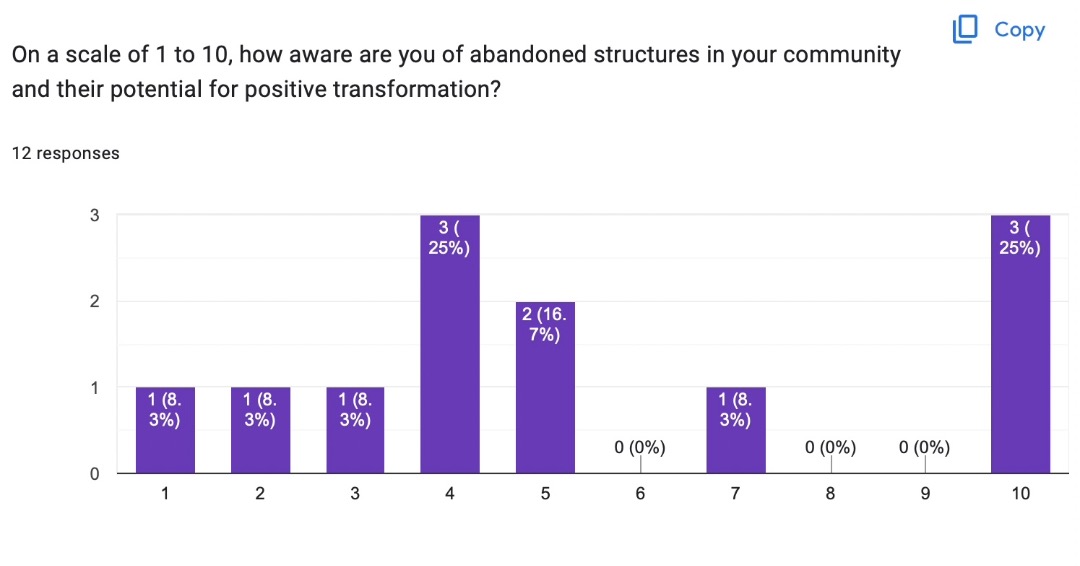
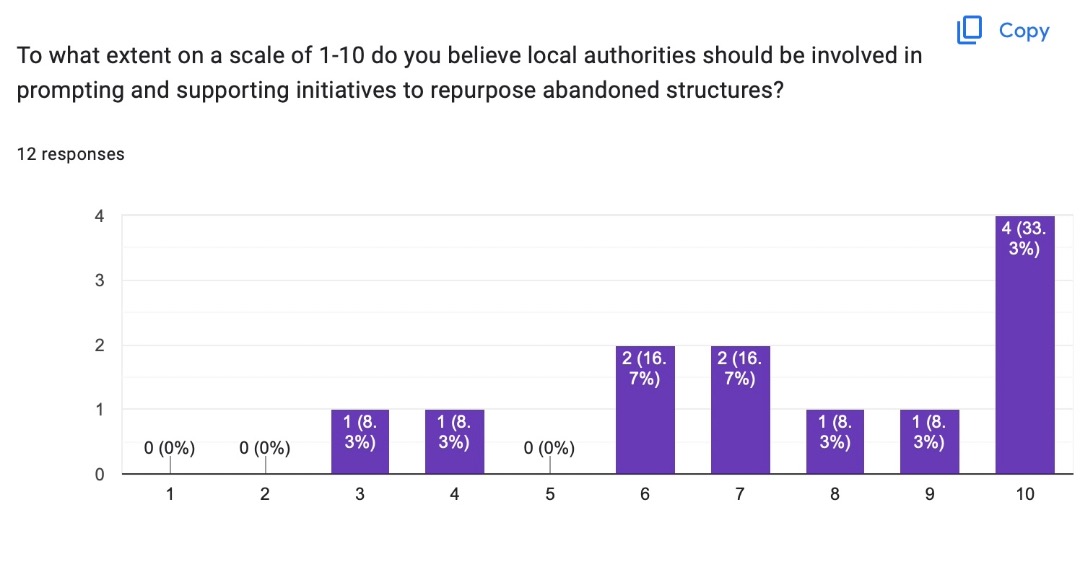
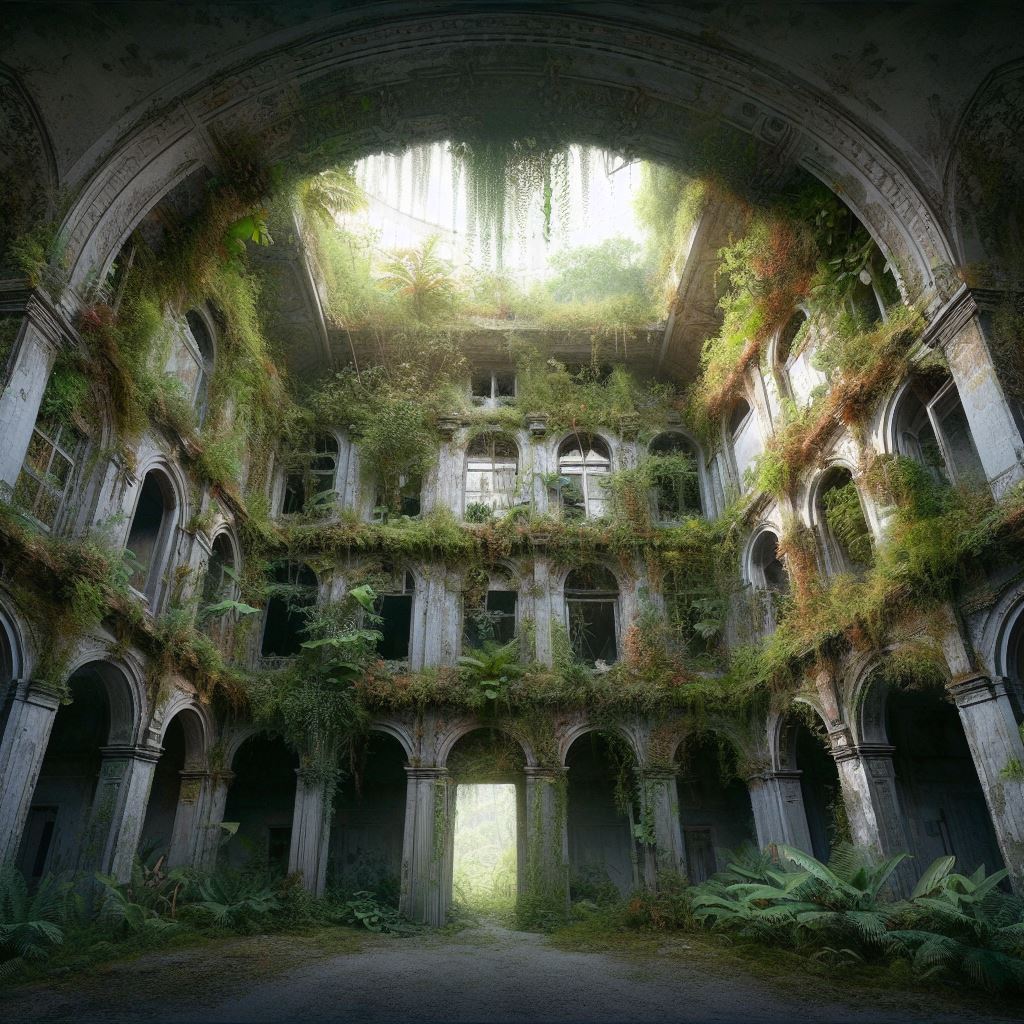
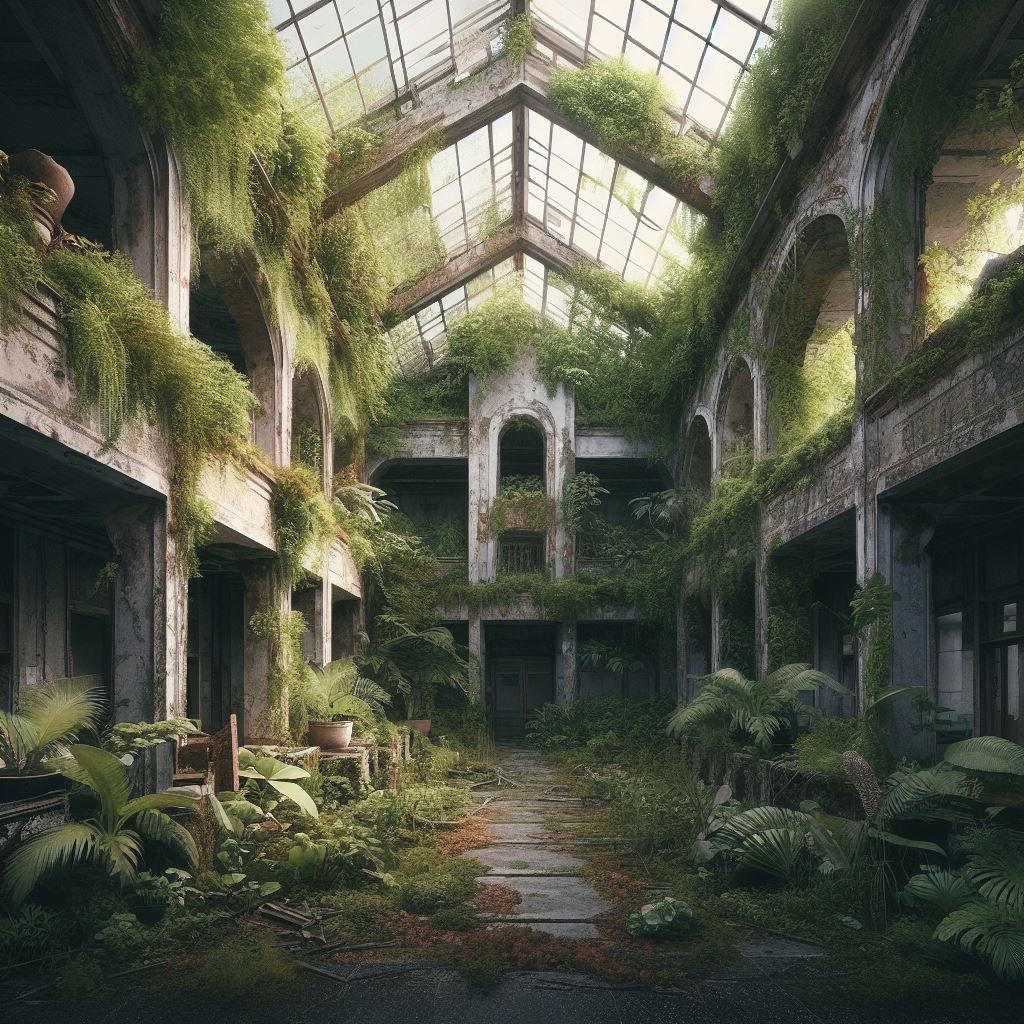
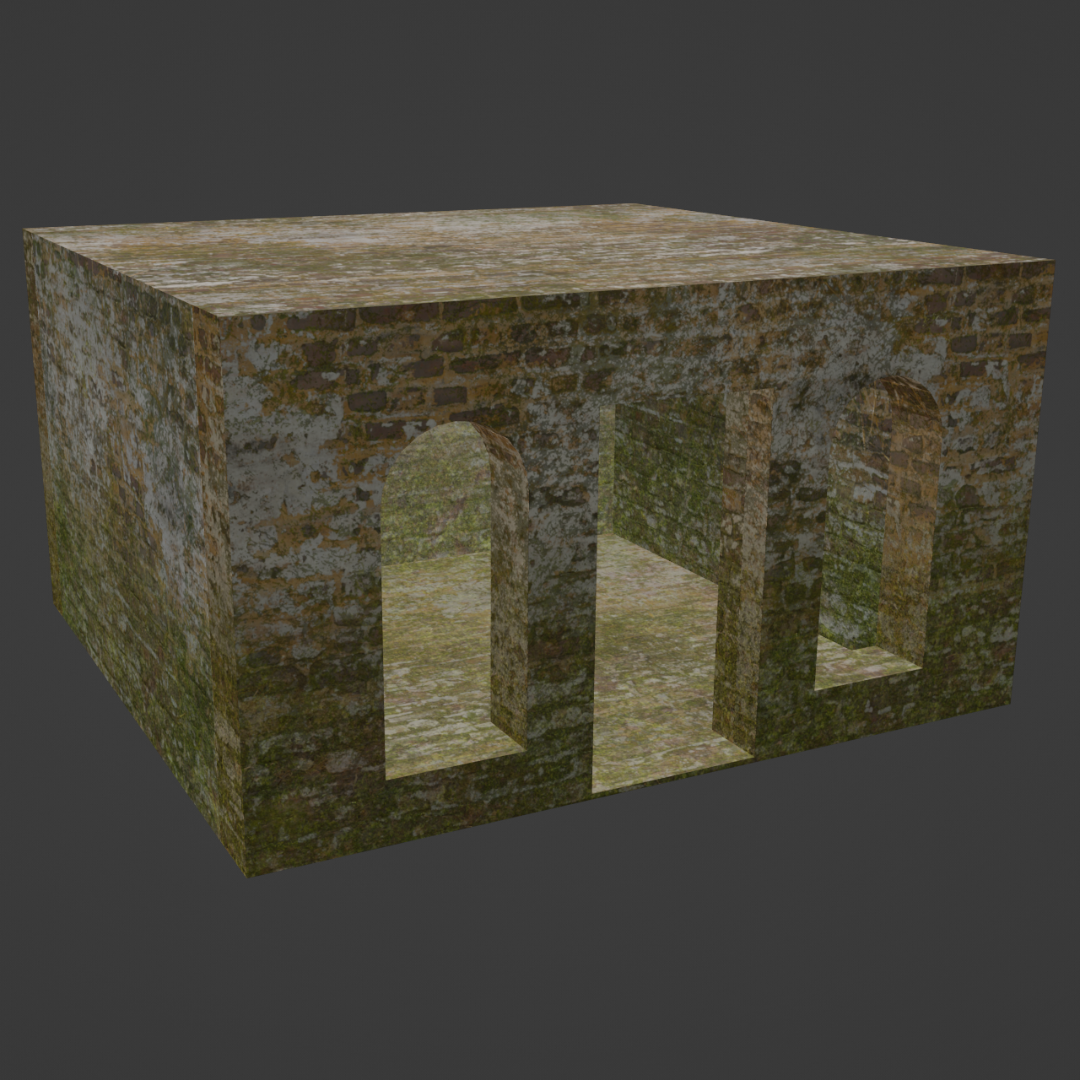
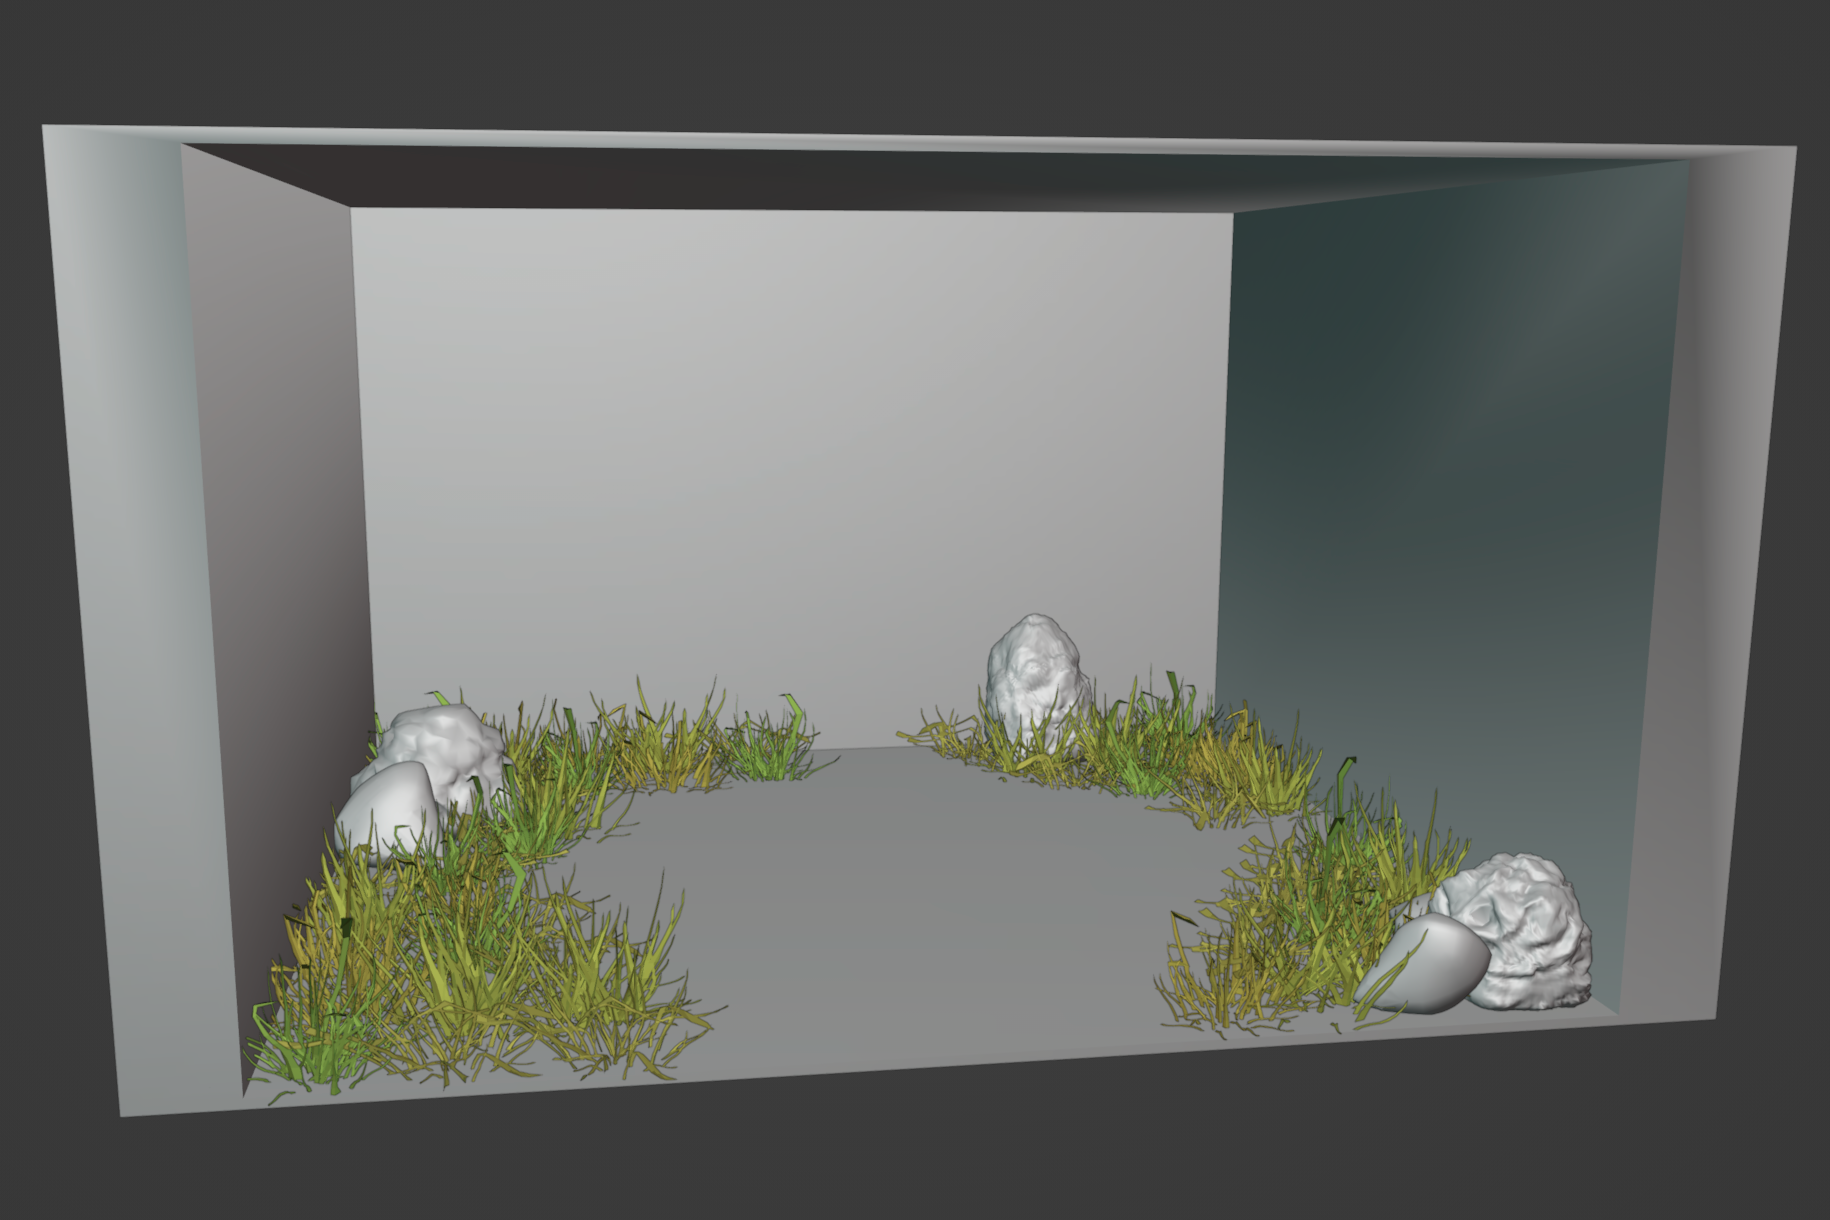
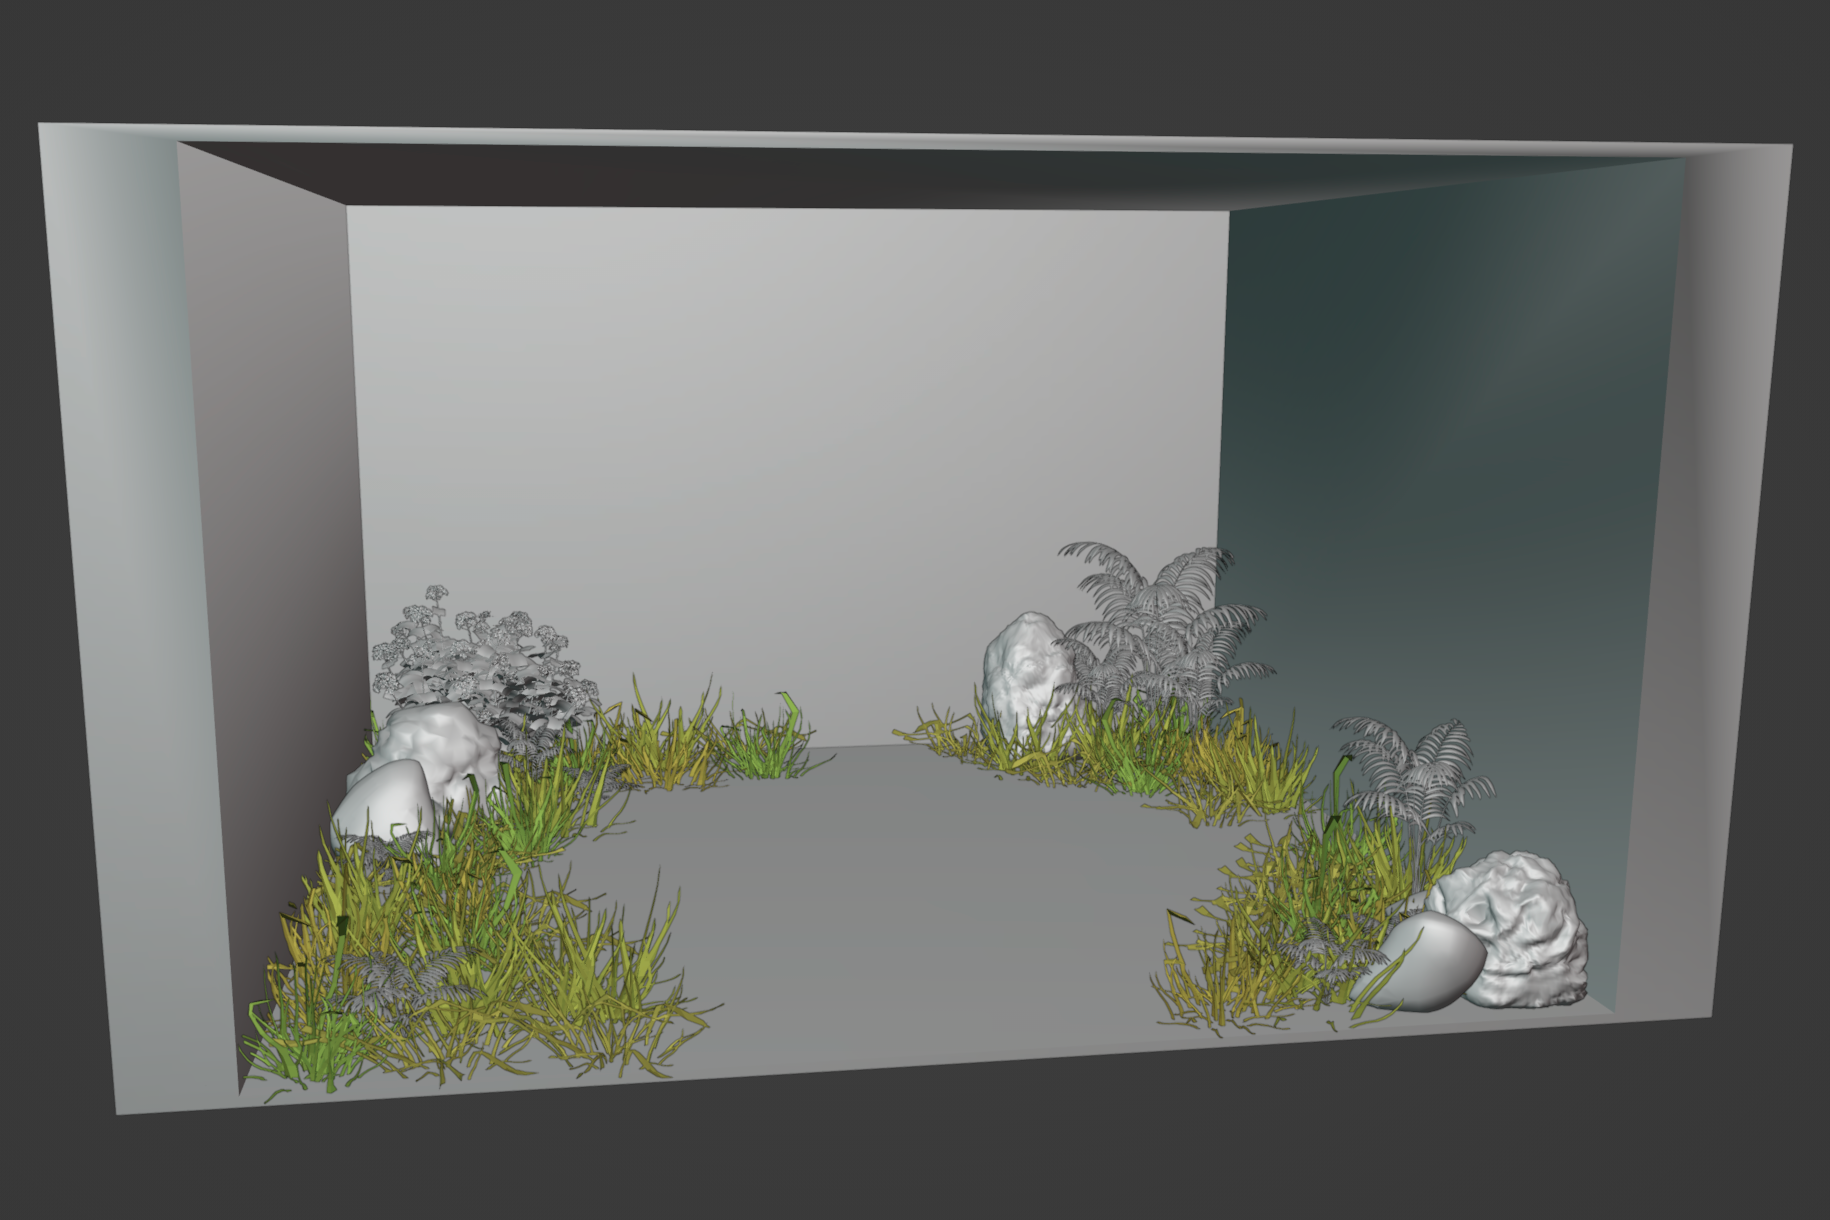
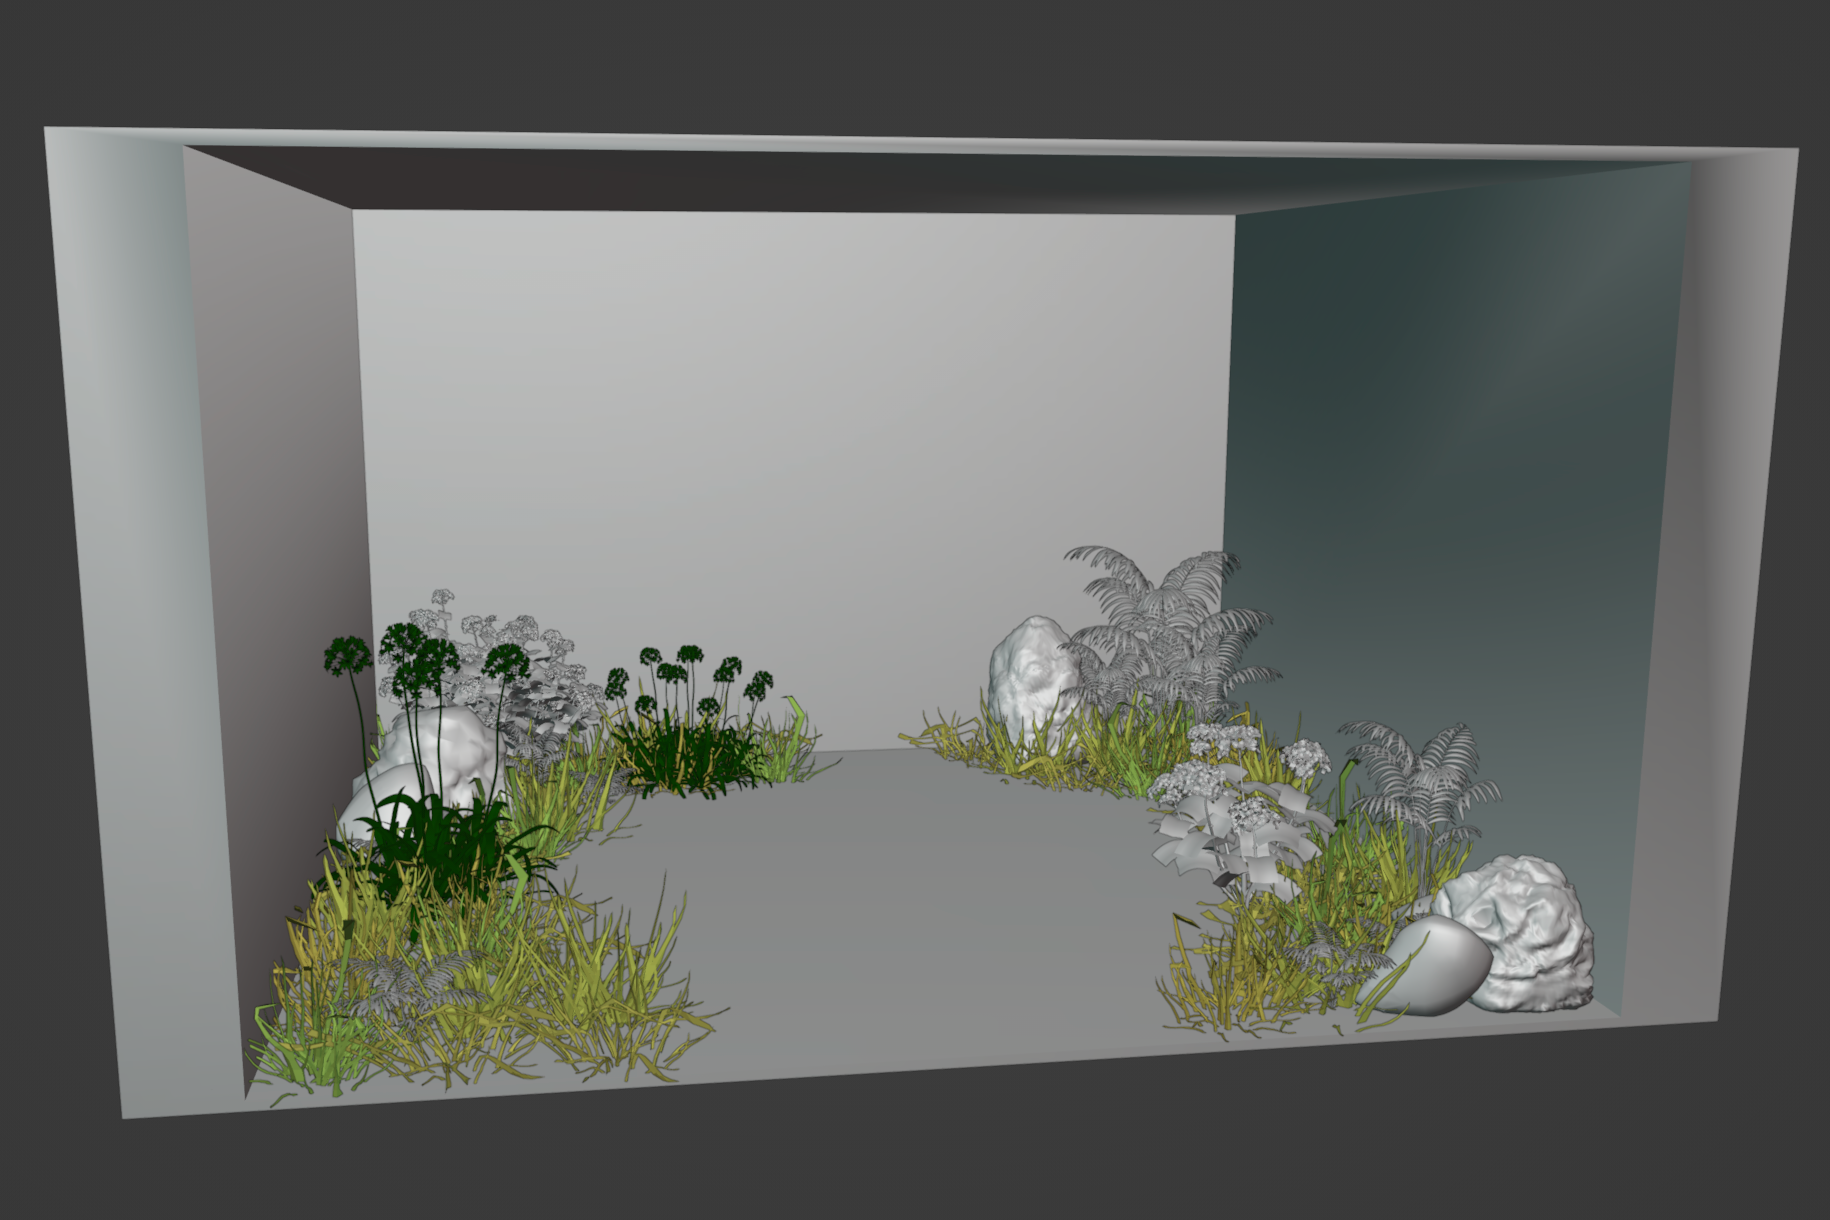
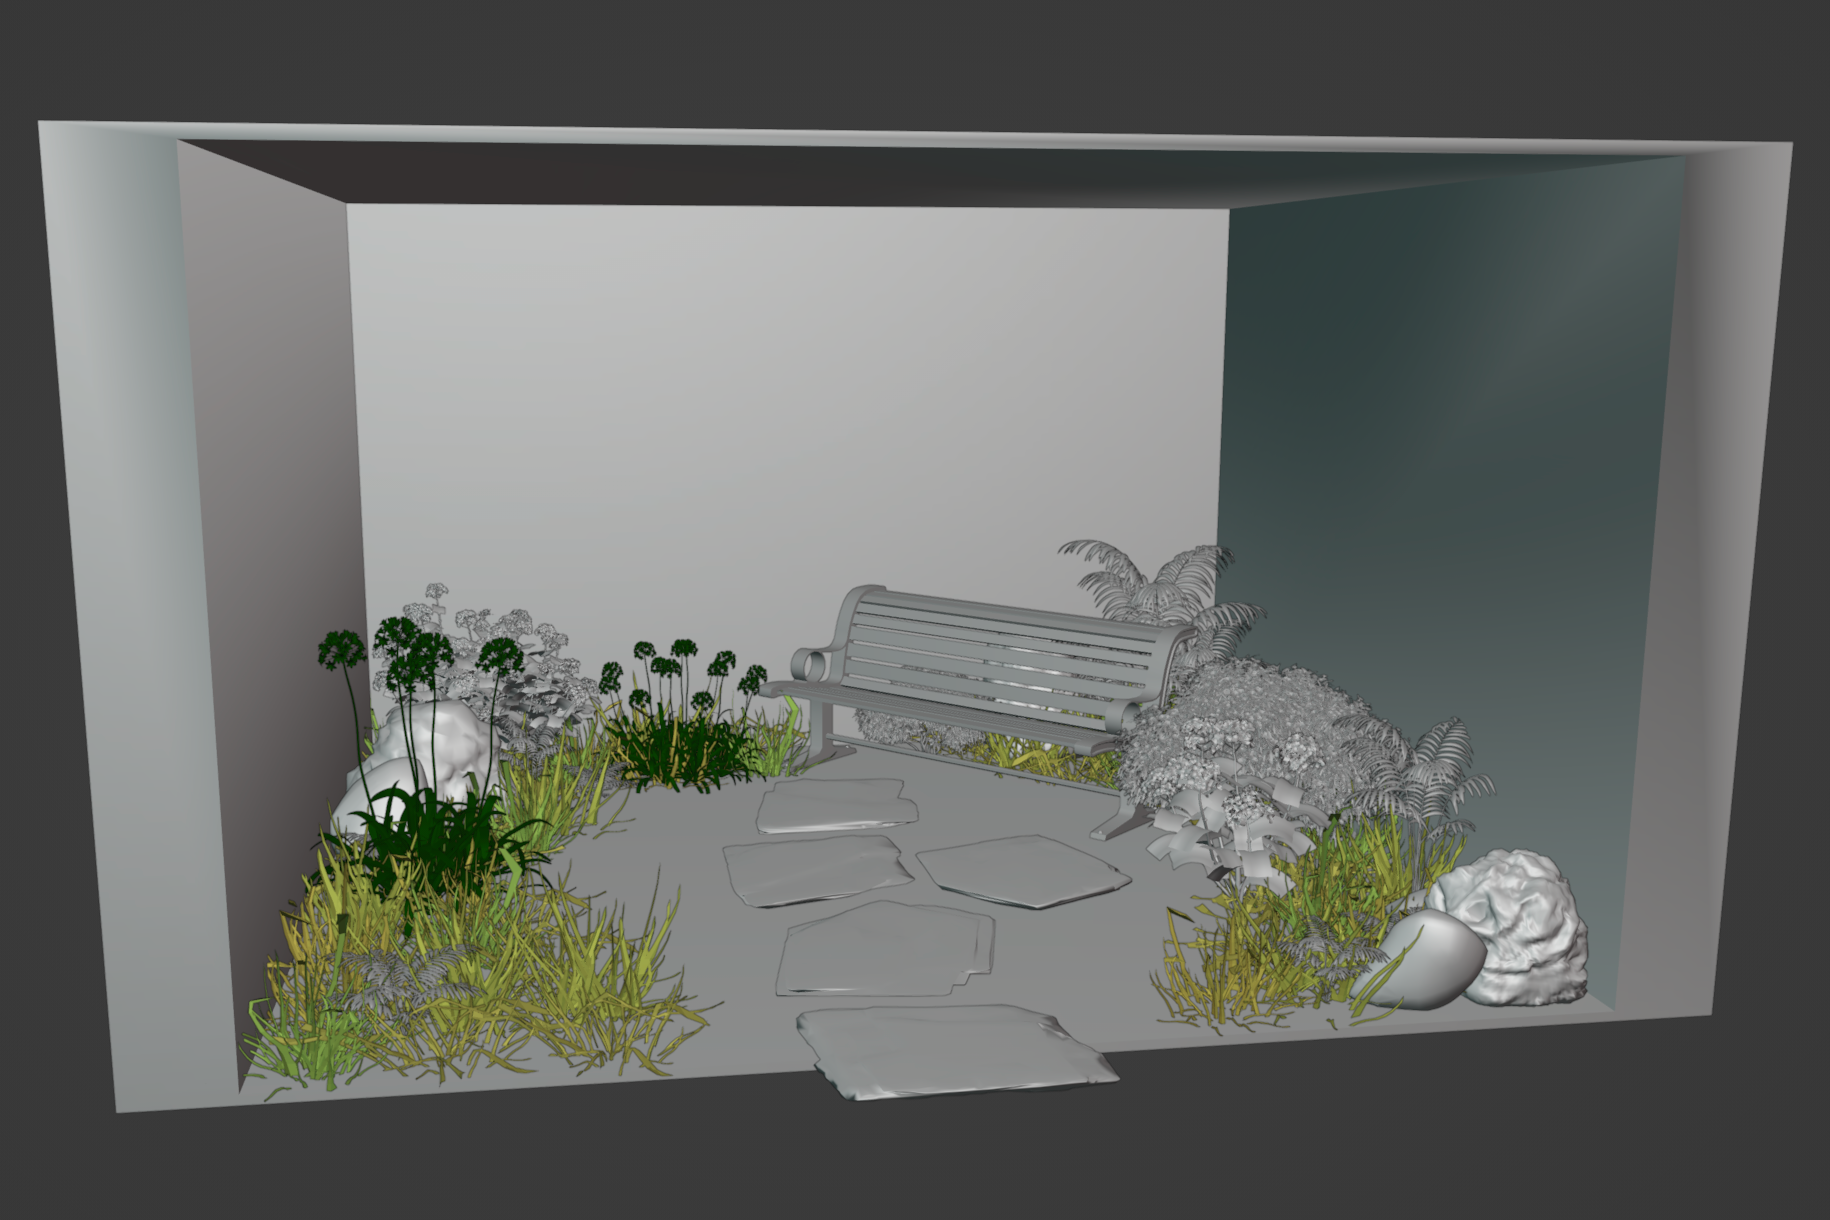
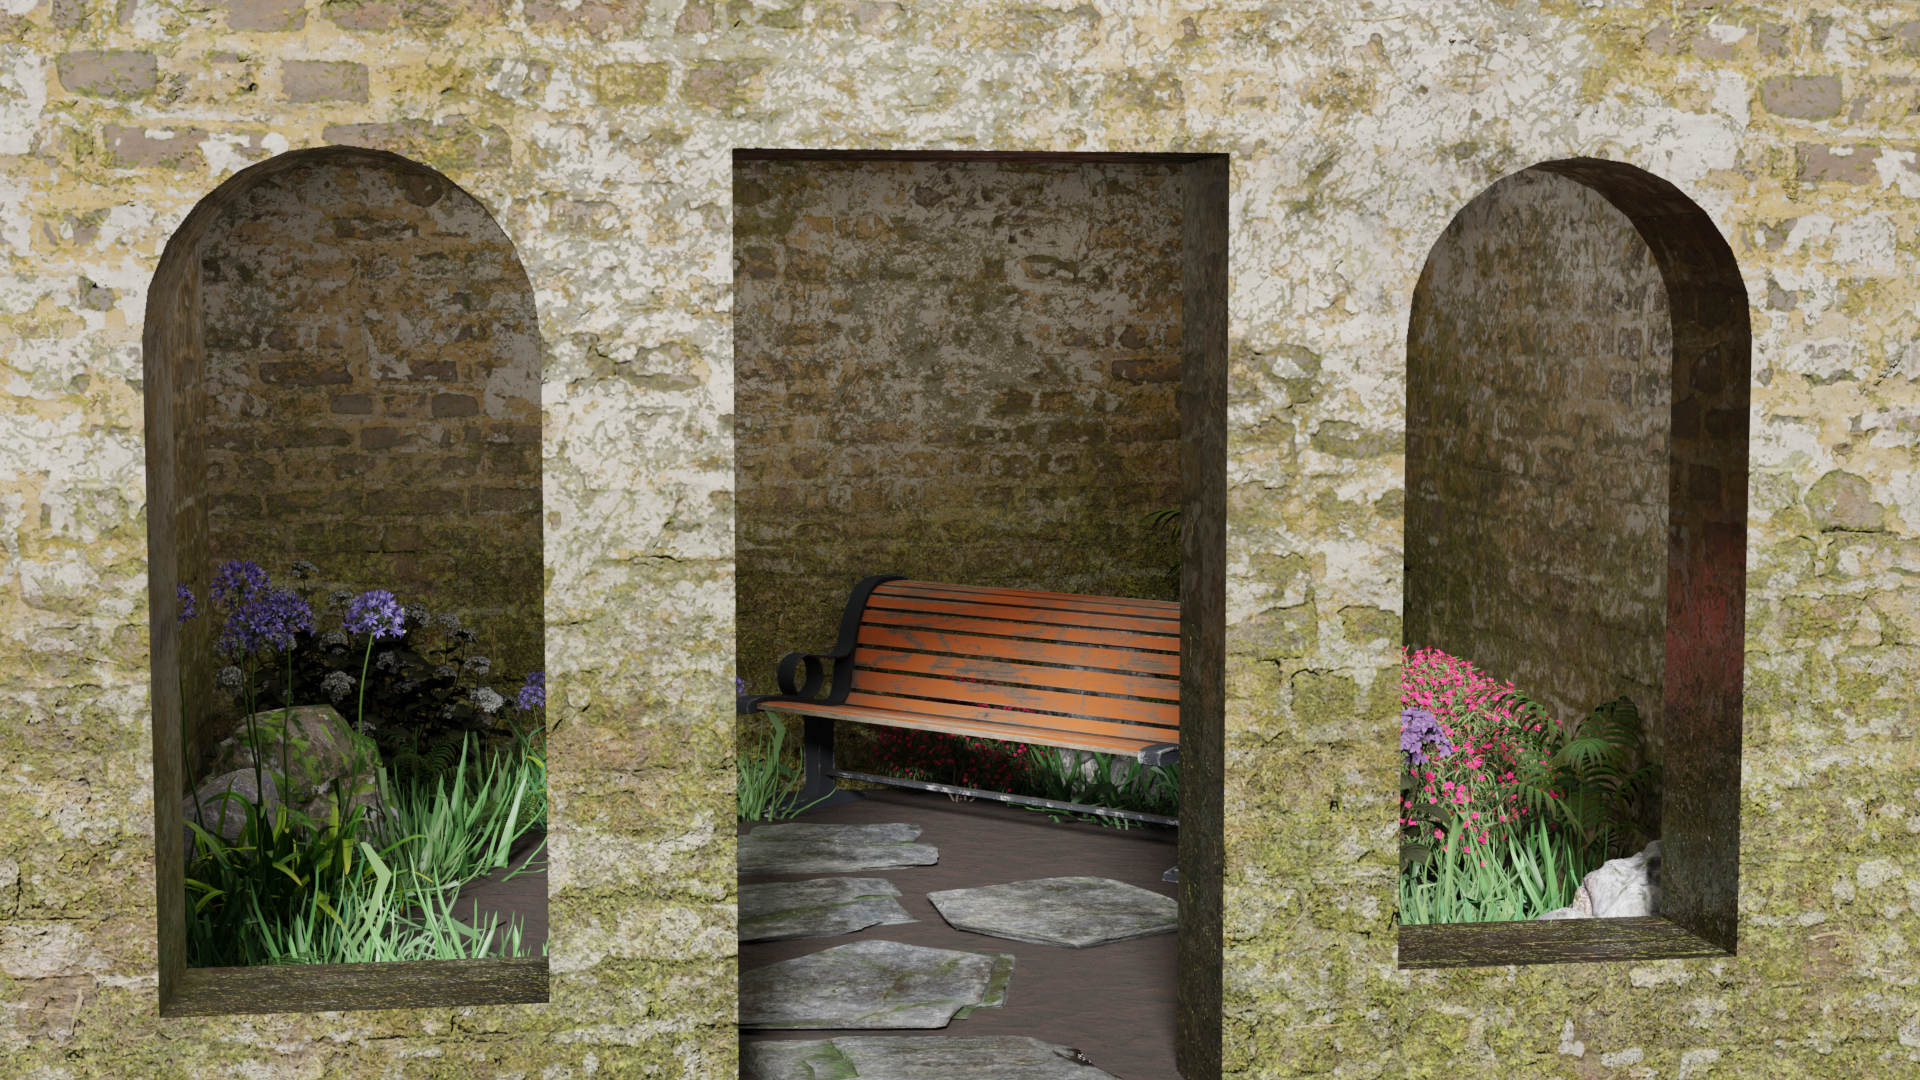
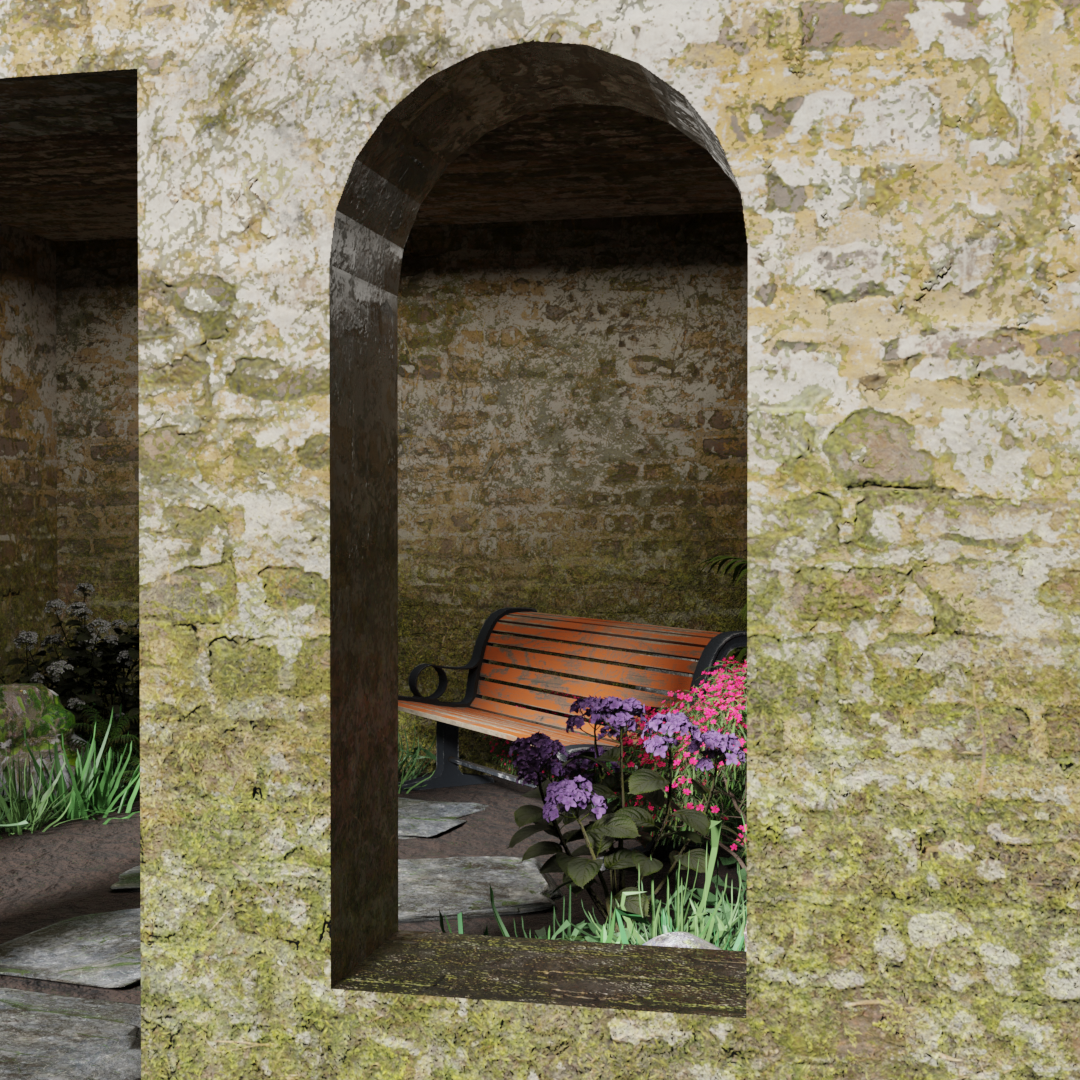
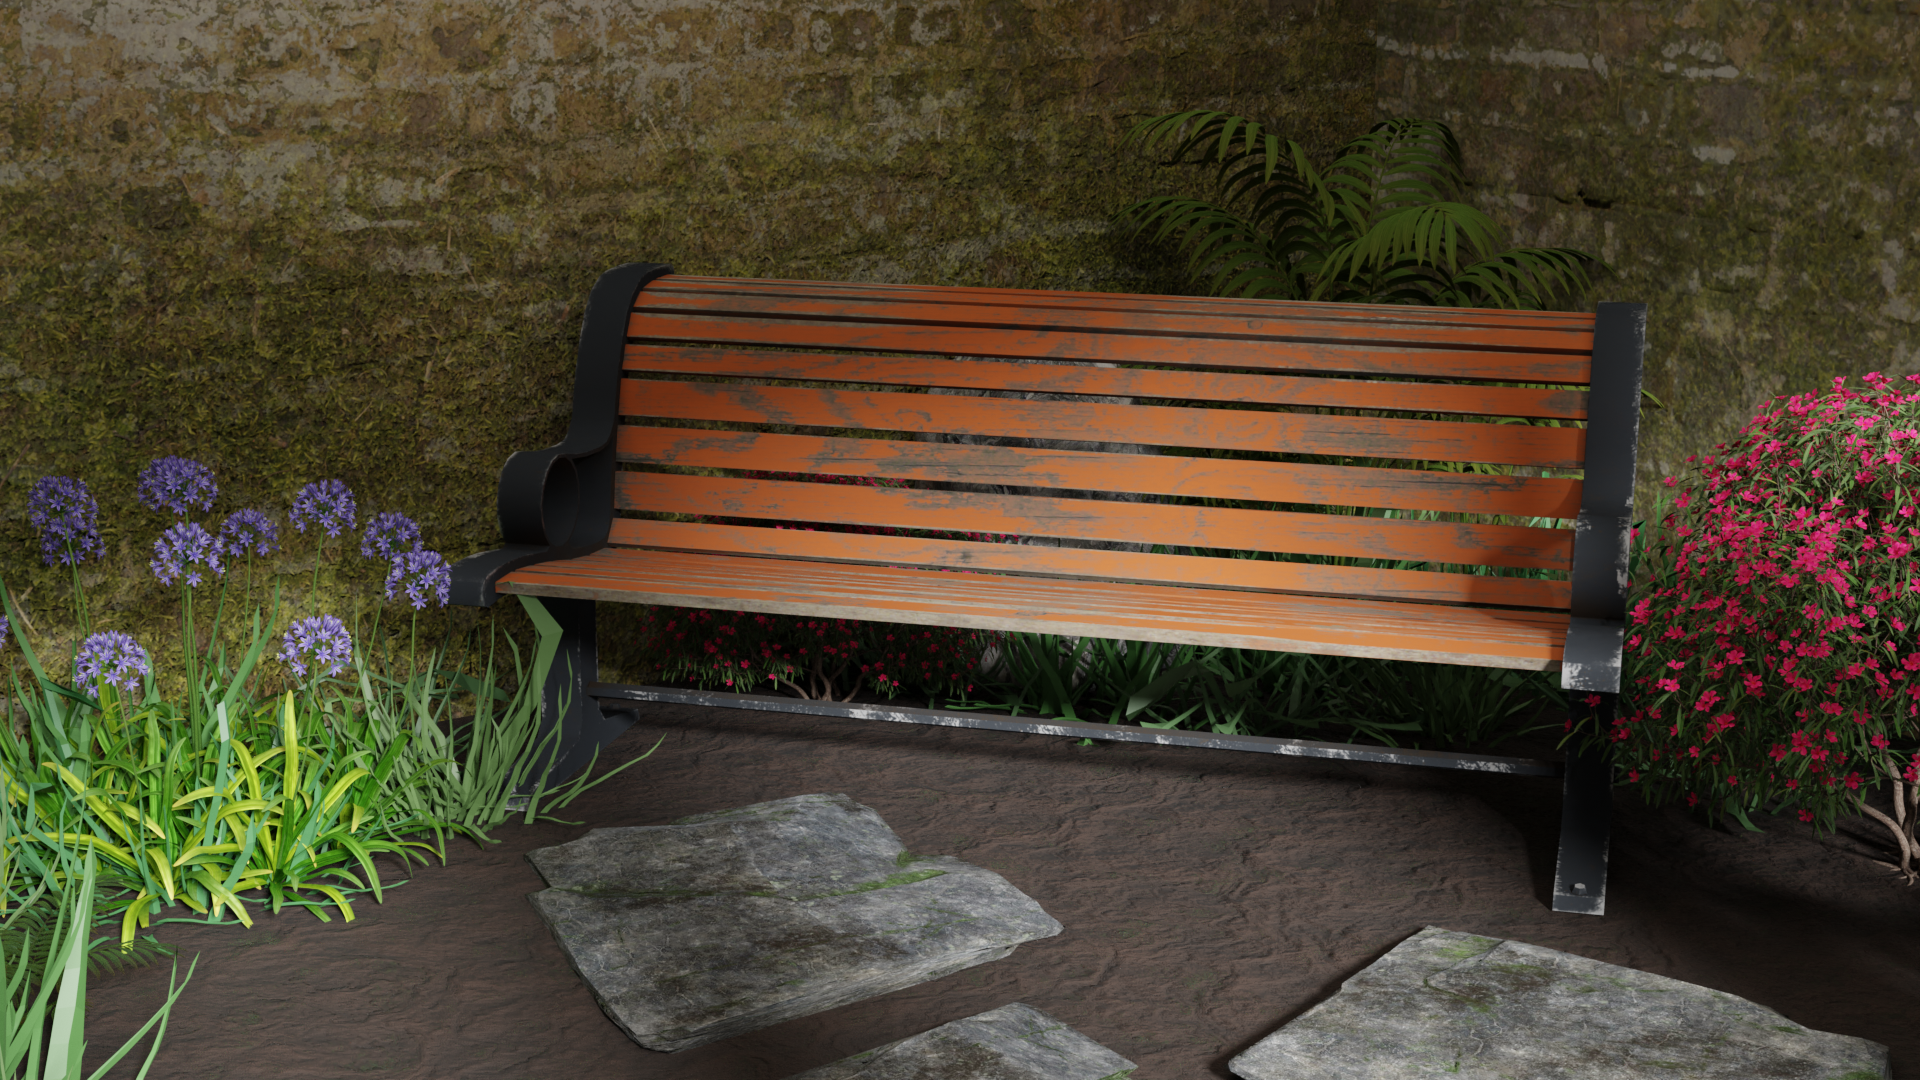
Commencing the RSA Case Study project, we were presented with six distinct briefs, each thoroughly explained to guide us on how to approach the questions posed. After selecting Brief 2, "Flourishing Places - How might we collectively reimagine a regenerative future of the built environment to enable all life to flourish?" I needed to pinpoint the specific topic related to the question. Initially, I contemplated connecting it to nature, considering the brief's emphasis on enabling all life to flourish, which, in my interpretation, includes nature. This notion also aligned with SDG Goal 3, promoting good health and well-being by incorporating more nature into densely populated cities and towns. A few days later, my interest was sparked by the concept of terrariums, providing a promising link to the nature aspect of the brief. To further tie it to the built environment, as stipulated in the question, I envisioned incorporating a terrarium-style space into existing abandoned buildings instead of constructing new structures.
Commencing the RSA Case Study project, we were presented with six distinct briefs, each thoroughly explained to guide us on how to approach the questions posed. After selecting Brief 2, "Flourishing Places - How might we collectively reimagine a regenerative future of the built environment to enable all life to flourish?" I needed to pinpoint the specific topic related to the question. Initially, I contemplated connecting it to nature, considering the brief's emphasis on enabling all life to flourish, which, in my interpretation, includes nature. This notion also aligned with SDG Goal 3, promoting good health and well-being by incorporating more nature into densely populated cities and towns. A few days later, my interest was sparked by the concept of terrariums, providing a promising link to the nature aspect of the brief. To further tie it to the built environment, as stipulated in the question, I envisioned incorporating a terrarium-style space into existing abandoned buildings instead of constructing new structures.